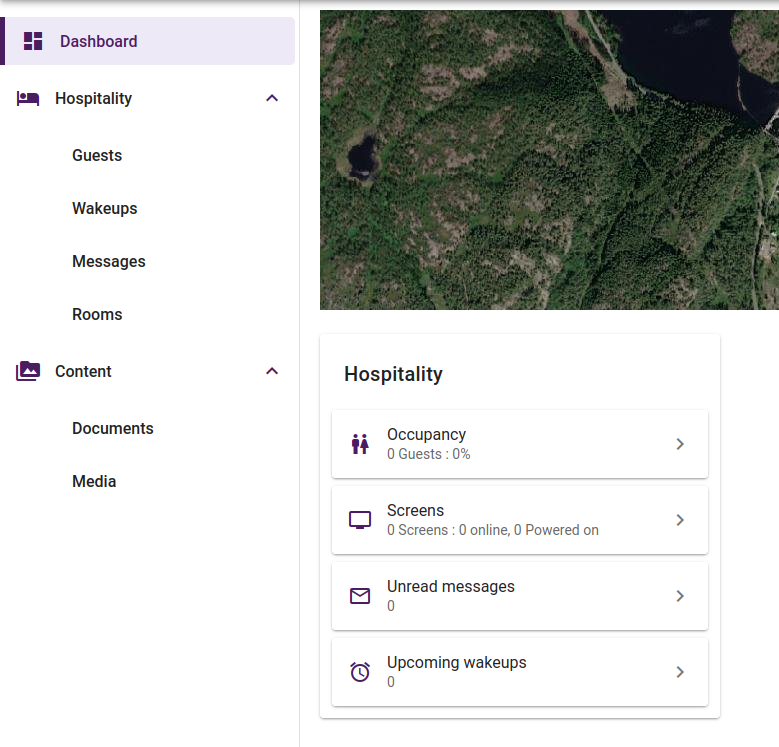
A site is meant to represent a real physical site in which one or more displays are installed. A site belongs to a reseller and properties such as location and address can be set on a site.
When switching to a site-context in the portal you will be greeted by a site-dashboard showing the location of the site and some aggregated real-time data:
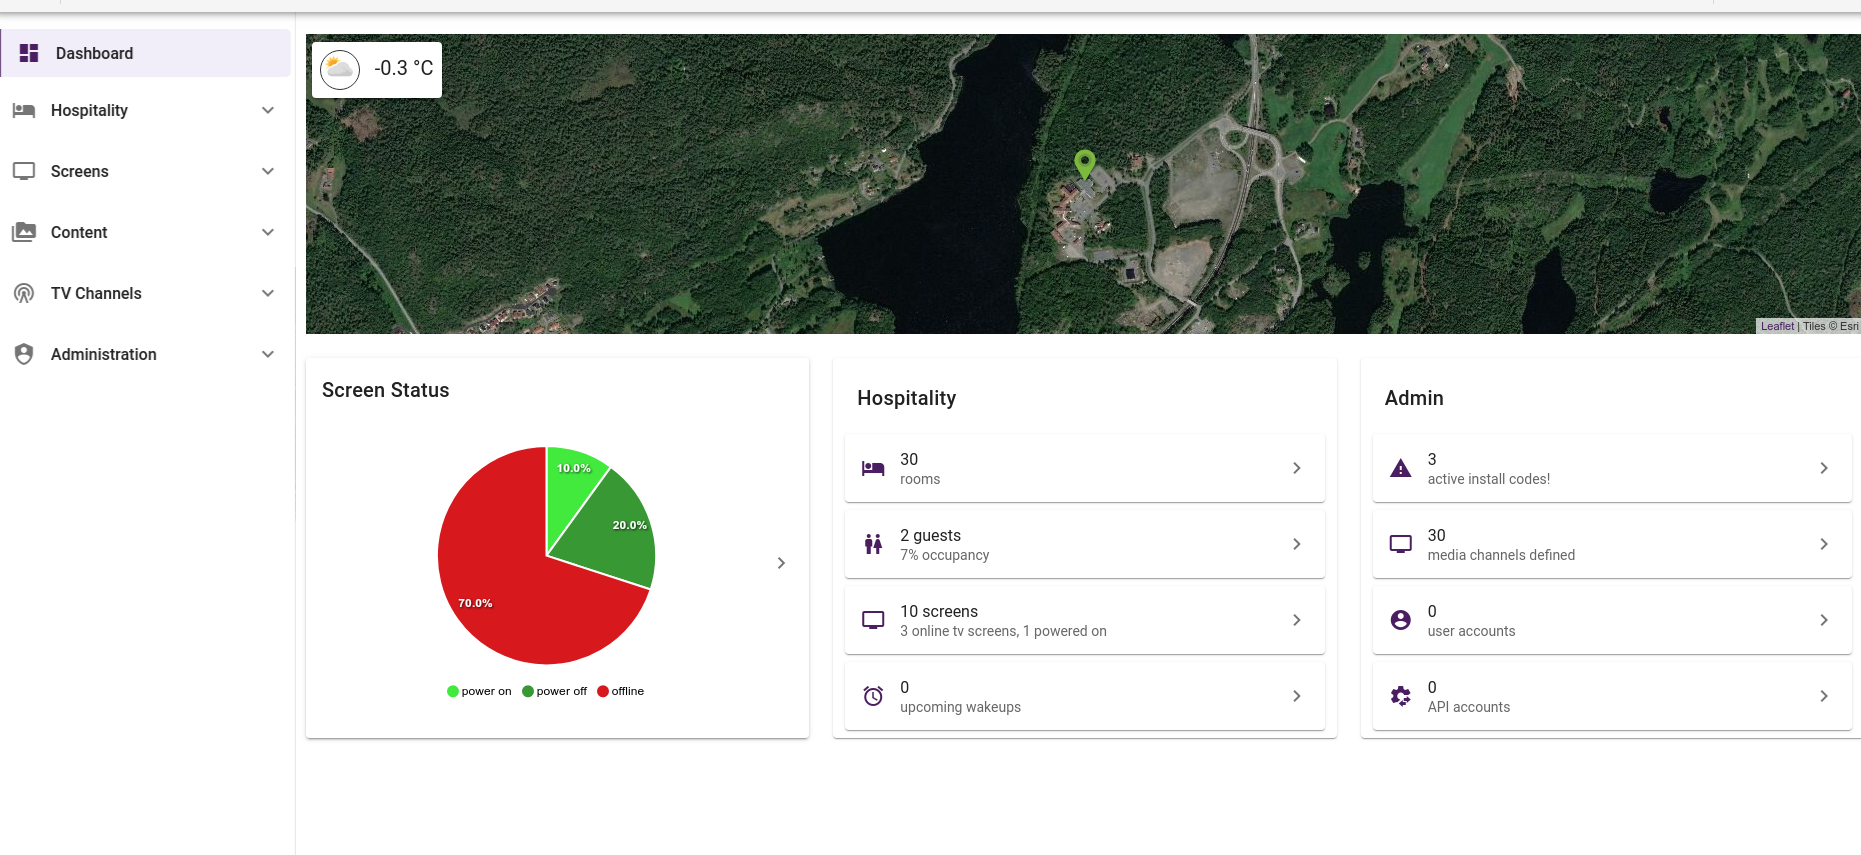
To be able to perform any useful operations on a site-context, one or more Licenses must be attached to the site. A license will define certain features that are available to the site.
¶ Locations
A location is an entity that can be used to create relations between various other entities in the system such as guest/residents, screens, maintenance tasks etc, but also locations are used to structure other locations such as buildings and floors.
Locations always belong to one location category.
A location typically represents a physical location or area at a physical site. A hotel room is a typical location.
¶ Generic locations
Under a site you can manage locations under Administration -> Location setup:
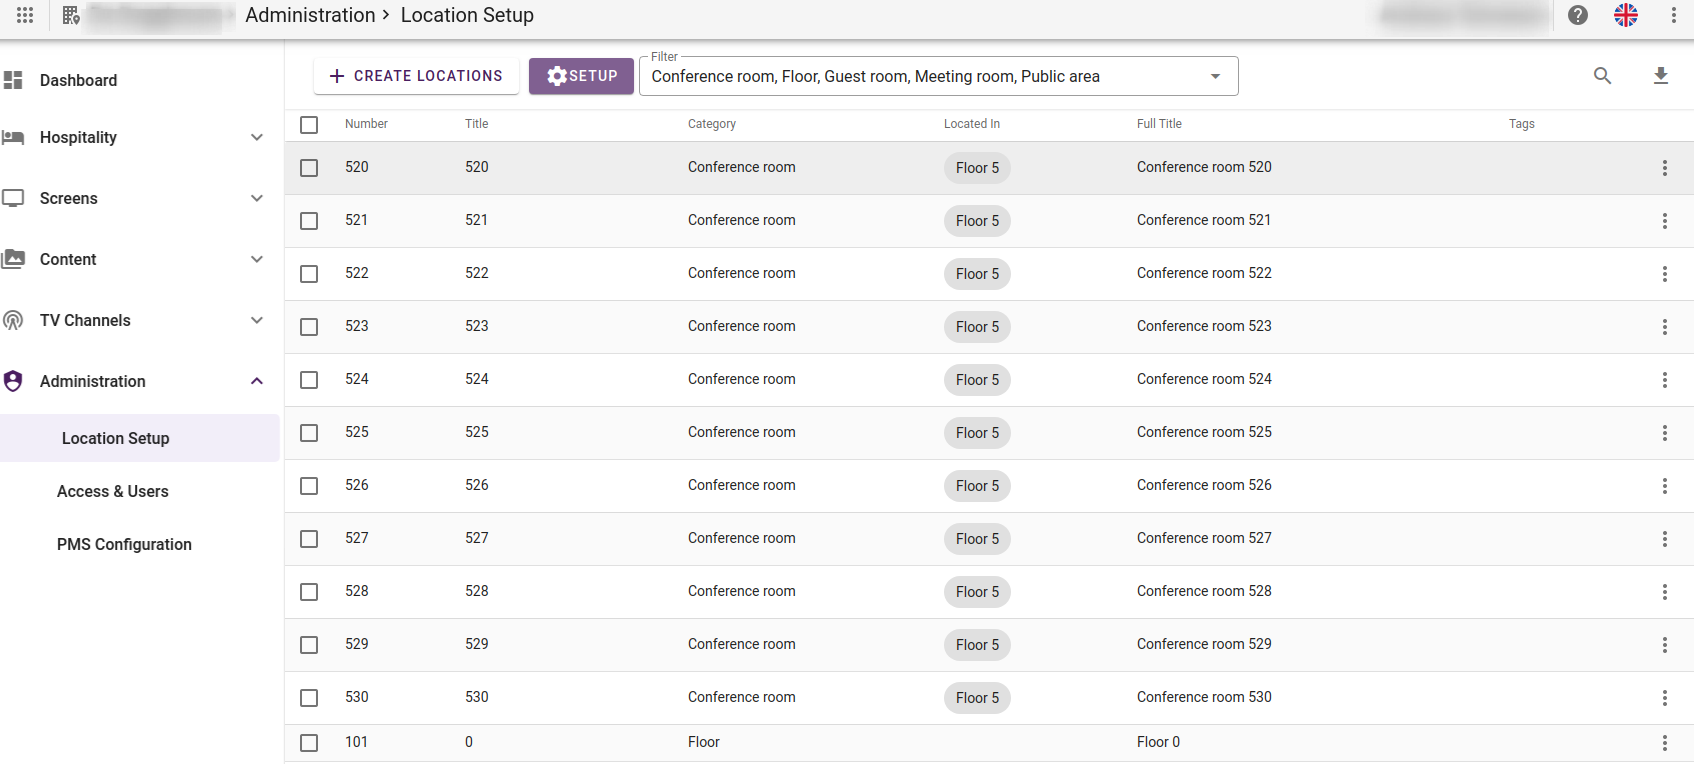
Here you can add new locations in bulk, define relations between locations and manage other location properties.
The Number field is used for PMS communication so it is important to set the same number as in the PMS system.
The Full title is used in TV Screens as Location (Room dropdown list).
You can define your own location categories and custom tags by pressing the SETUP button. Tags can be useful for filtering rooms, especially with the upcoming housekeeping feature.
¶ Hospitality locations(guest rooms)
Locations that are to be used by hospitality features for checking in guests and connecting screens must be of a hospitality category. Hospitality categories are defined under Hospitality -> Config.
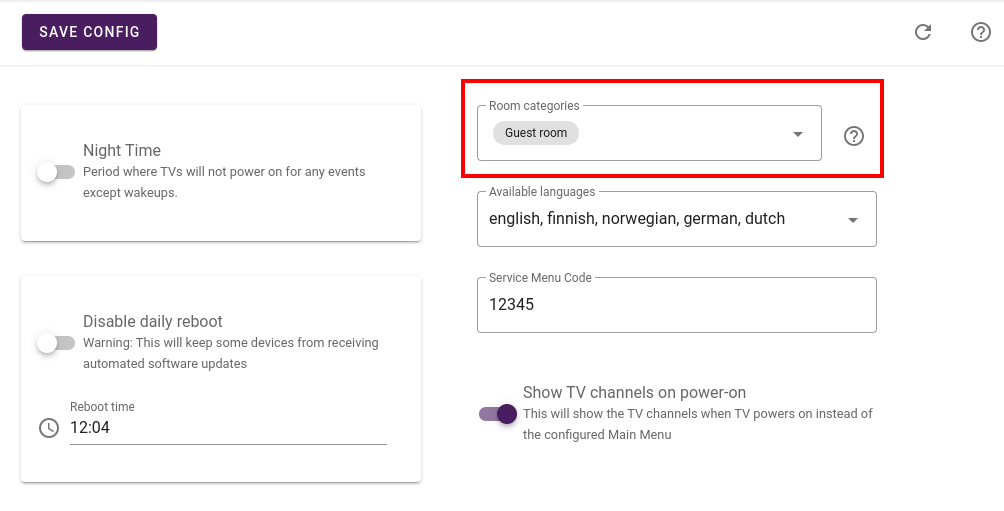
Only locations of the defined location category will be listed in hospitality-related features such as guest check-in.
¶ Hospitality features
Certain features that apply to sites are hospitality related. These are built specifically to facilitate a Hotel-like environment with in-room displays and public area displays.
The main focus in a hospitality setting is rooms and guests. Displays are connected to rooms, and guests are checked into said rooms. Guest management can be handled by an external Property Management System(PMS), directly via the management portal or the rooms can be left vacant at all times. Keep in mind that certain services require a room to be checked in to operate.
¶ Screens
Detailed screen-related documentation is available here(TV) and here(signage).
To provide content on screens for a site, screens have to be registered and authenticated with that site. A screen will be tied to a location as various features in the system will trigger screen behavior based on their location.
¶ Screens and License limits
The combined count of clients in the sites attached licenses defines the amount of screens that can be registered with a site. Adding more screens than defined in the license pool will result in a watermark displaying on the screen.
¶ User Access
A user with the proper site access will be allowed to manage the user-access of any user that has been granted explicit access to the site. This is managed under Administration -> Access & Users:
¶ Adding a user
Adding a user to a site will create a new user if that user, identified by the username (e-mail), does not already exist in the system. If the user already exists, the access level of that user for the current site will be changed. The user that changes the user access will not know if the added user existed in the system or not.
¶ API Access
Under Administration -> Access & Users one can also add API access accounts. These accounts can then access API functions for this site.
Certain APIs are restricted by license options and are not available unless there is a valid license set.
¶ Roles
The access for a user is defined by its role(s). You can give a user multiple different roles.
¶ Default roles
To cover the basic needs, we have 4 default roles that you can choose from.
- Site Admin
Full access. - Front Desk
Manages hospitality (check-in/check-out, wake-ups, messages) and can change the text on a document. - Content Manager
Manages the content to be displayed on a screen. - Site Maintenance
Set up and maintain Screens and Chromecasts on a site.
¶ Custom role
If the default roles do not cover the access level that you need for your users. You can create your own custom role.
You define your custom role by marking one or more sub-menus under Access Selection.
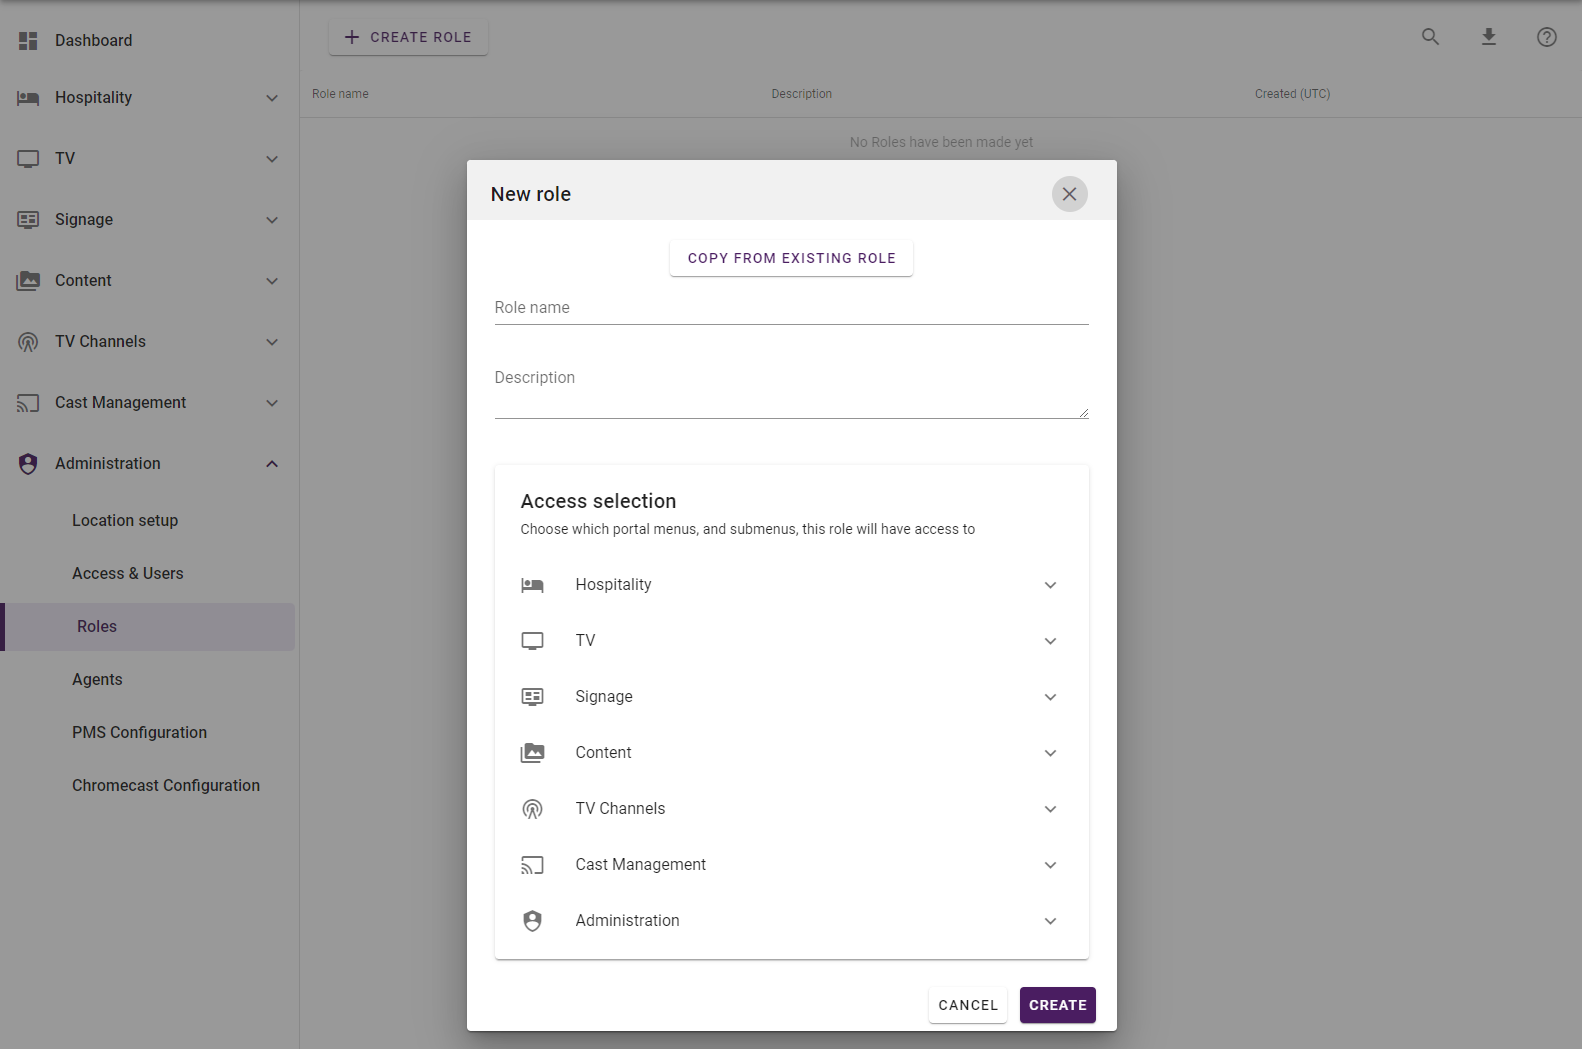
To create a custom role, navigate to "Administration", and select "Roles", and click "CREATE ROLE".
¶ Access Selection
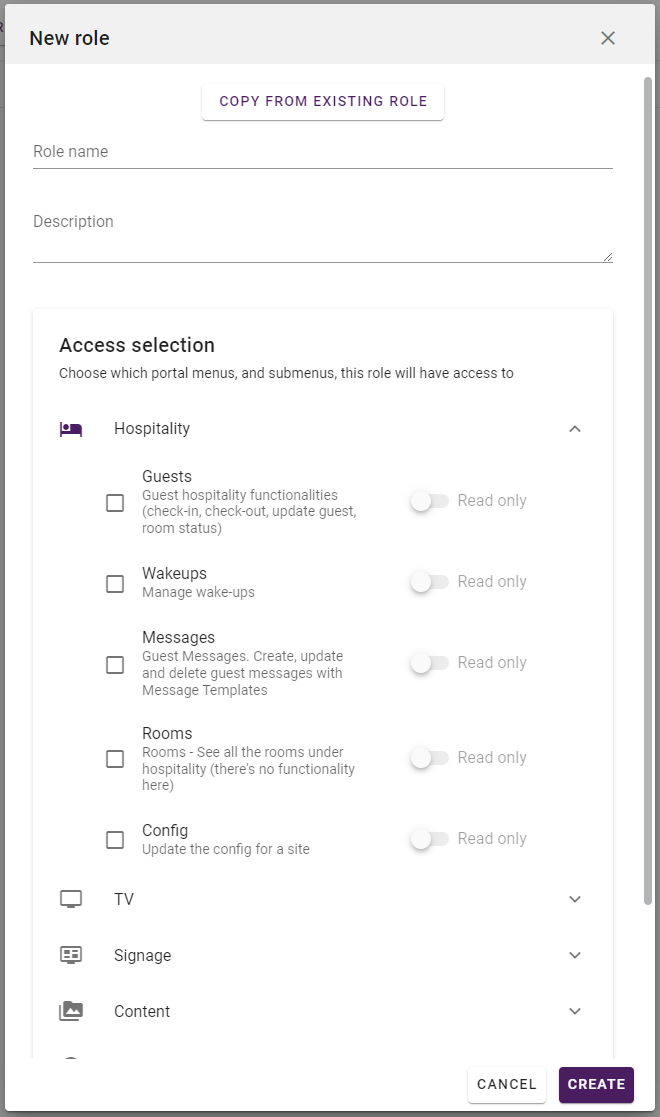
Each menu shown in this view, directly correlates to one of the sub-menus. A user will have access to do everything under a given sub-menu, based on the sub-menus that you have marked for your custom role.
You can click on one of the main-menus and choose one or more sub-menus for your custom role.
If you wish for the user to see but not edit, under a certain sub-menu, you can activate the "Read only" toggle. This is a setting per sub-menu.
¶ Copy an existing role
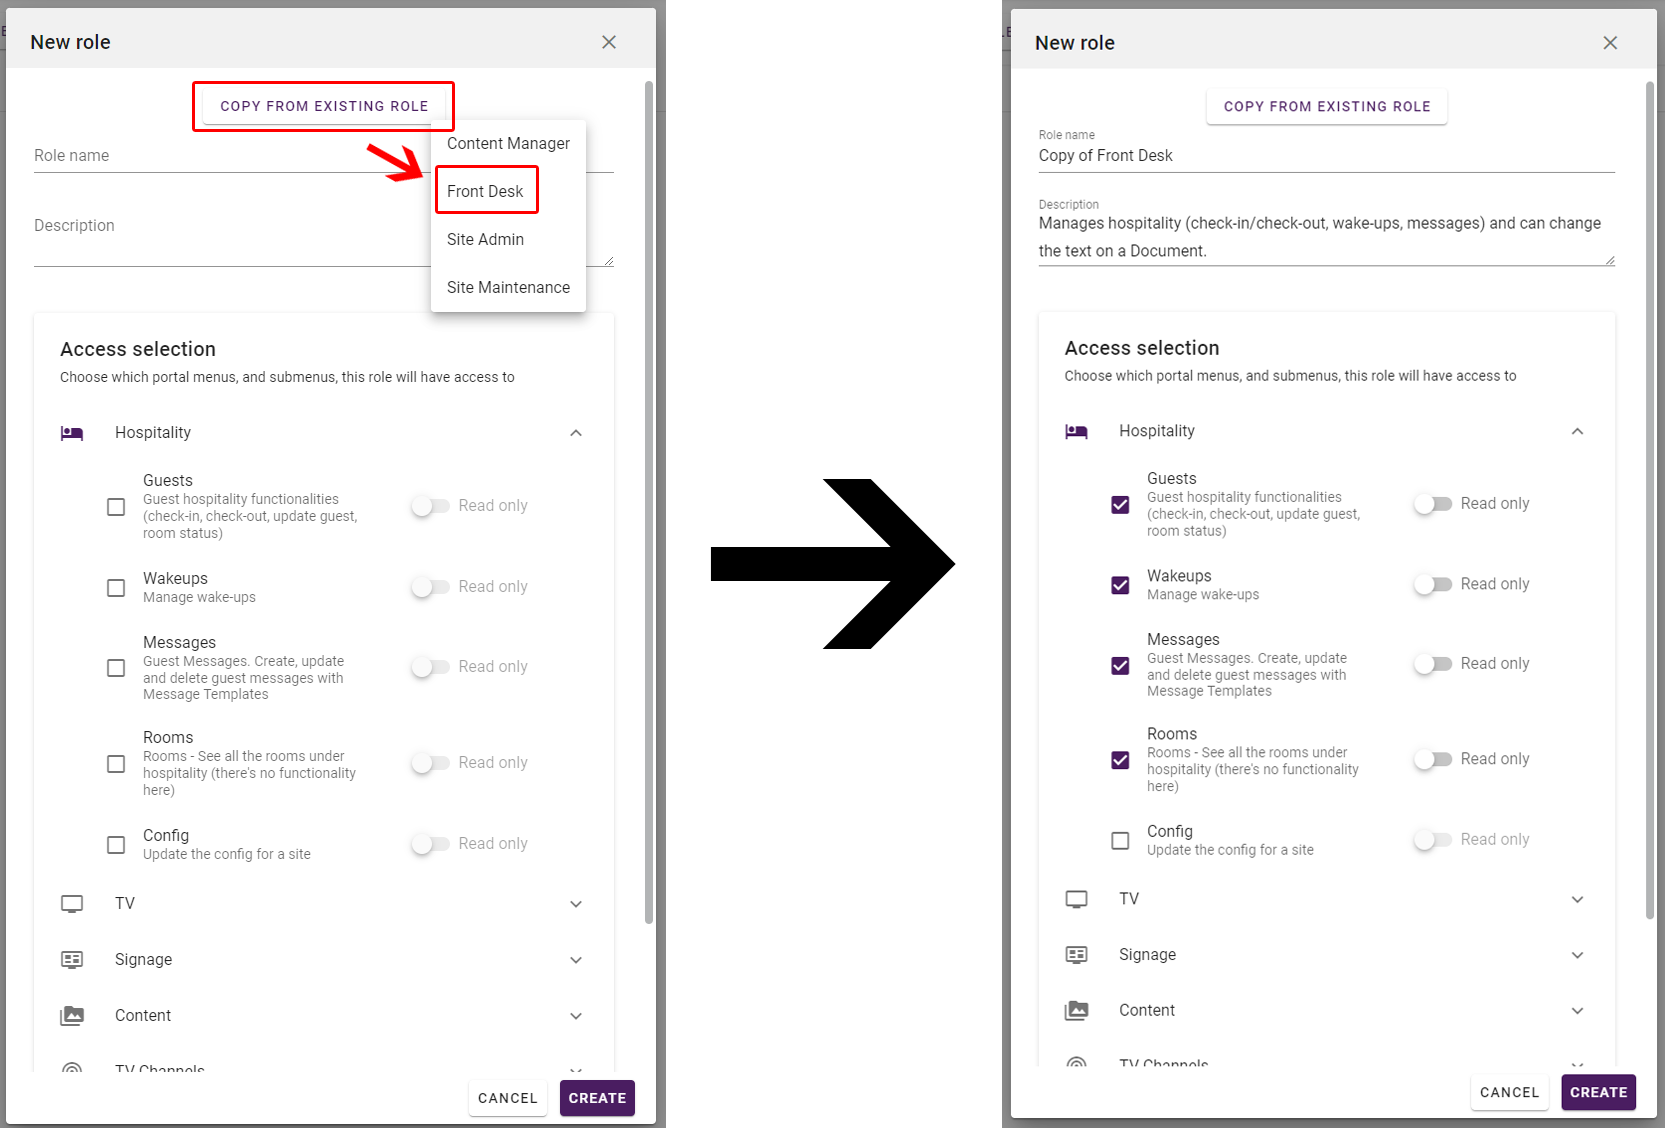
If you wish to build upon an existing role (for example, Front Desk), you can do so by clicking on the "COPY FROM EXISTING ROLE" button.
This will show you a selection from the already existing roles.
After choosing a role, the view will copy the name, description and mark off every sub-menu that this role already has access to, including if they're read-only or not.
After you have created the role, then go to "Access & Users" and apply it on a user.
Example of the user with the access selection from the role above:
