Before installation, please check if your Samsung TV is of model Tizen or Tizen-TEP by checking our list of Supported Screens - Samsung. The installation has do be done from a factory clean mode. If the TV is fresh from the supplier the TV can be installed directly. Otherwise, you have to do a factory reset before you install the TV.
¶ Mandatory Settings
These settings have to be configured for the TV to work correctly.
¶ Initial settings at power-on
The TV should not be connected to any RF-network when doing the initial settings.
- Power on the TV
- Current Local Set: < Your region >
TV will reboot if region is changed from default. - Select Basic Setup
- Set Location: < Your Country >
- Set Clock mode: Auto
- Set Pin Code
- Accept Terms and Conditions
- Skip creating account
- Skip Enrollment to Samsung Enterprise program
- In Samsung Standalone Menu set:
(Smart Service - Apps Editable = On) - Power Off the TV
¶ Settings in Samsung main-menu
- Power on the TV
- Remove the sound feedback:
Menu – Sound - Expert Settings – Sound Feedback: OFF - To turn Eco-solution and Screen Saver off
Menu – General - Power and Energy Saving – turn all options OFF - To disable Anynet+
Tizen 6.5 and 7: Menu – Connection - External Device Manager - Anynet+ (HDMI-CEC) - OFF
Tizen 9: Menu - General & Privacy - External Device Manager - Anynet+ (HDMI-CEC) - OFF
¶ Settings in Samsung Home Menu
- Enter the Samsung Home Menu by pressing the home button on the RC
- Disable the Samsung TV Plus:
- Hover over Samsung TV Plus
- Press Arrow Down or hold down the select button
- Select Remove
- Select Disable
- Select Apps
- Select the apps you want and install them
- Exit the Samsung Home Menu
¶ Settings in Samsung stand-alone menu
- Enter the Samsung Standalone Menu:
- Press MUTE - 1 - 1- 9 - OK
-
Select TEP Custom App - Tep Custom App (URL): ON
-
Select App Management
-
Select: Server URL: https://setupmy.tv/tep
Click Install and wait for the application to be installed -
Select Use Home Key: ON
-
-
Press Return on remote until you get to the Standalone Menu
-
Select Virtual Standby - Virtual Standby Mode: ON
-
Press Return on remote until you get to the Standalone Menu
-
Select Smart Service
-
Select Apps Editable: OFF
-
Select Menu
-
Select Menu OSD: OFF
-
Select Network Setup
-
Select Expert Settings
- Select IP Remote and set it to Enable
-
Select Network settings
-
Select wanted type of connection, Wireless or Wired connection.
- Wireless connection: Select SSID and enter password
- Select Network Status to check if you are properly connected to Internet.
If needed, enter the correct IP settings
-
-
Press Return on remote to get back to Smart Service category
-
Select Quick Settings Editor
-
Remove all options by hovering over the item and pressing the up key
-
Select save
-
-
Press Return on remote to get back to Smart Service category
-
Select Service Discovery: OFF
-
Service Discovery needs to be ON for Google Cast, however this may flood the network with SSDP traffic.
-
Press Return on remote until you get to the Standalone Menu, and power off the TV
-
Power On the TV again
-
Install TV using preferred method and follow instructions on TV
¶ Optional Settings
These setting are not needed for the TVs to work with the system.
¶ LAN out configuration
if your TV supports LAN out it can be used to provide internet connection for streaming devices such as Apple TV or Google Chromecast
- Enter the Samsung Standalone Menu:
Press MUTE - 1 - 1- 9 - OK - Select Network
- Select LAN Out: ON
- Select VLAN ID: ON
- Select Solution VLAN ID:
<VLAN ID for TV commnunication > - Select Device VLAN ID:
<VLAN ID for Screen sharing device >
¶ INSTALLING NATIVE APPLICATIONS
Native applications are applications provided by Samsung or 3rd party vendors such as YouTube which can be installed on the TV and offered as an additional service to the guest.
-
Enter the Samsung Standalone Menu
( MUTE-1-1-9-OK): -
Disable TEP Custom App
-
Enter Smart Service
-
Set Apps Editable: ON
-
Power TV Off and ON
-
Enter the Samsung Home Menu by pressing the Home button
-
Select Apps
-
Select the apps you want and install them
-
After installing the apps enter the Samsung Standalone Menu again
(MUTE-1-1-9-OK) -
Enable TEP Custom App
-
Enter Smart Service
-
Set Apps Editable: OFF
This setting will be included in the clone-file during cloning.
¶ Factory reset
A factory reset must be done, if you have a TV onfigured on an earlier system, and you want re-configure the TV.
- Enter the Samsung Standalone Menu:
MUTE - 1 - 1- 9 - OK - Select System - TV Reset - TV Reset
¶ Cloning
Cloning allows you to do all the configurations on one TV and use a clone file from this TV to configure all other TVs during the installation.
Use USB1 for cloning.
Ensure that the TV used to create the clone is configured for the same region as the TV(s) receiving the clone.
¶ Creating a clone file
This is how you create a clone file:
- Insert a USB-pen in USB1 of your screen
- Enter the Samsung Standalone Menu:
MUTE - 1 - 1- 9 - OK - Select Cloning - Clone TV to USB
¶ Install TV using a clone file
This is how you install a TV using a clone file from a previously installed TV:
- Insert a USB-pen in USB1 of your screen
- Power On the TV:
- Current Local Set: Your region
- TV Installation Type: Factory Menu
- Enter the Samsung Standalone Menu:
MUTE - 1 - 1- 9 - OK - Select Cloning - Clone USB to TV
- Select Copy data from USB to TV Set: OK
When completed, the TV will restart. - Power-On TV again
- Install TV using preferred method and follow instructions on TV
¶ Cloning TVs remotely from the management portal
¶ Prerequisites
- Access to a webserver
- Minimum FW: T-NKLB****-1680.5
- Same FW on TV that creates the clone and TV that receives the clone
- sClone Clone file:
- Enter the Samsung Standalone Menu:
MUTE - 1 - 1- 9 - OK - Select Cloning - Clone TV to USB
- Select Copy data from TV to USB Set: OK
- Find the clone file on the USB
- Example path: T-NKLBDEUC --> sClone --> CloneEncrypted.sclone
- Enter the Samsung Standalone Menu:
¶ Cloning
- Log on to the management portal and access the site with the TVs you want to upgrade.
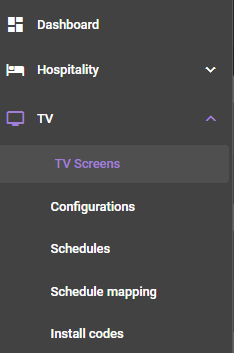
- Select the TV - TV Screens
- Right-click the TV you want to upgrade
- Select Manage - Send Mgmt Message
- Select command: Clone update (TIZEN TEP)
- Fill in the URL field with the URL to the sClone file
- Example URL: http://<yourdomian>/CloneEncrypted.sclone
¶ Update TV-firmware from USB
¶ Create a firmware update dongle
The TV firmware is provided in form of a zip-file. Unzip the zip-file. Copy the content of the unzipped folder to the root of the USB-dongle.
The folder structure is normally like this:
/ (root-folder)
|__ < Firmware name > (1)
|__ info.txt
|__ image/
|__ upgrade.msd(1) Example of firmware names are: T-KTM2DEUCB, T-NKLADEUCB. All Samsung FW use this style of naming.
¶ Updating the TV-firmware
After you have created a firmware update dongle, you can now update the firmware on the TV.
- Power-On the TV
- Insert the Firmware Update dongle in USB1 of the TV
- Enter the Samsung Standalone Menu:
MUTE - 1 - 1- 9 - OK - Select System - SW Update
- Select Yes on the question: ""Do you want to search?" when prompted by the TV
- Select Yes on the question: "Update from version xxxx to version yyyy" when prompted by the TV
The TV will now update the TV and reboot when the update is completed.
¶ Update TV-firmware remotely from the management portal
¶ Prerequisites
- Access to a webserver
- BEM version of the Firmware is hosted on a web-server reachable by the TV's
¶ Upgrading
- Log on to the management portal and access the site with the TVs you want to upgrade.
- Select the TV - TV Screens
- Right-click the TV you want to upgrade
- Select Manage - Send Mgmt Message
- Select command: Firmwware upgrade(Tizen)
- Fill in the fields with the following data.
- URL: URL to the firmware stored on the webserver. Complete url including filename.
- Filename: Name of the firmwarefile e.g. swuimage.bem.
- Version: Version as specified in the info.txt file. The info.txt file is a part of the firmware package.
- Filesize: Size of the firmware file in bytes.

- Send Message.
The FW will now be uploaded to the TV if the TV is in Standby
Only update 5-6 TVs at the same time, and wait 10 minutes before upgrading the next set of TVs.
This will minimize the traffic in the network.
¶ REMOTE CONTROLS
¶ Uniguest S1 Remote
You must set the Otrum RC to the correct protocol and address.
- To set the protocol: Press RED button for at least 2 seconds and then 010 while
keep pressing the RED button. - To set the address: Press BLUE button for at least 2 seconds and then 01 while
keep pressing the BLUE button (address 1 is also the default setting in the remote
so its normally not needed to set this).
Click here for more details about remote control programming.
¶ Netflix
For the HBU80000, the TV needs to run the 1680.5 firmware or newer to use Netflix without TBM.
Terms and Policy needs to be accepted to use Netflix.
This should be accepted during the first time install, but it is recomended to make sure it is through the Standalone menu.
- Enter the Samsung Standalone Menu:
(MUTE - 1 - 1- 9 - OK) - Select Smart Service
- Select Terms and Policy
If this has not been accepted in the first time install, then a popup should appear where you can accept the Terms and Policy. This is part of the clone.
It is recommended to reboot the TV after first time installation of Hub.
Read more about native apps and Netflix here.