¶ General usage
General documentation for our Linux and Windows based players.
¶ Installation
¶ Registering the client
- Connect HDMI and power cable
- Wait until the player app starts (approx 30 seconds)
- Note the INSTALL CODE presented on the screen
- Open the management portal -> Signage -> Screens -> ADD
- Enter the INSTALL CODE and give it a name -> click on REGISTER -> assign it a content schedule and press SAVE
- Wait a few seconds for the content to load
Make sure to connect an ethernet cable, or press the F2 button to open WiFi settings if you wish to connect to a WLAN.
Note: If the player doesn't have an active internet connection, it will not show an INSTALL CODE.
Only one HDMI connection is supported.
¶ Keyboard shortcuts
You may use these keyboard shortcuts when installing the player for the first time to make installation less time-consuming:
- F1: Show Main Signage Player
- F2: Show Settings
- F4: Force quit application
- F6: Show Device Info
- F9: Toggle onscreen debugger (shows troubleshooting information on screen)
- F10: Toggle mouse cursor visibility
- CTRL+R: Restart application
¶ Extra keybindings for HD1 and 4K2 player
In addition to the shortcuts mentioned above, the HD1 player and 4K2 player also supports these:
- F3: Start Signage application (if not running already)
- F4: Quit application
- ALT+F4: Reboot player
¶ Configuring WiFi
The HD1 player supports 2.4GHz and 5GHz WiFi networks. It can connect to both public and hidden networks (where the SSID is not broadcasted).
There are two ways to connect the HD1 player to WiFi
¶ Connect to WiFi using keyboard
Connect a keyboard to the player and press the F2 button to open WiFi settings.
Enter WiFi name (SSID) and password. If the wireless network is hidden, then uncheck the "SSID Broadcasted" checkbox. Click on connect then reboot the player.
¶ Connect to WiFi using Hub
The player must already be connected with network cable before you can configure WiFi from the portal.
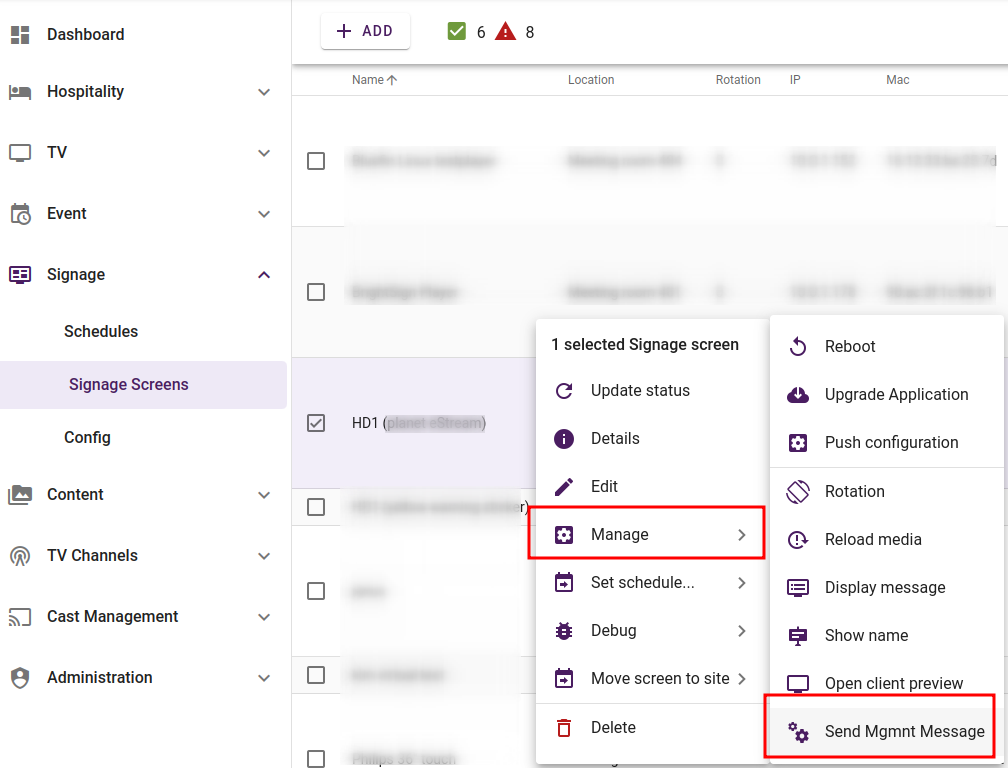
Right-click on the player and press Manage -> Send Mgmnt Message
Set command to "Configure WiFi (HD1)" and input the SSID/Password/Broadcasting.
If the network does not broadcast the SSID, then uncheck the SSID Broadcasting checkbox.
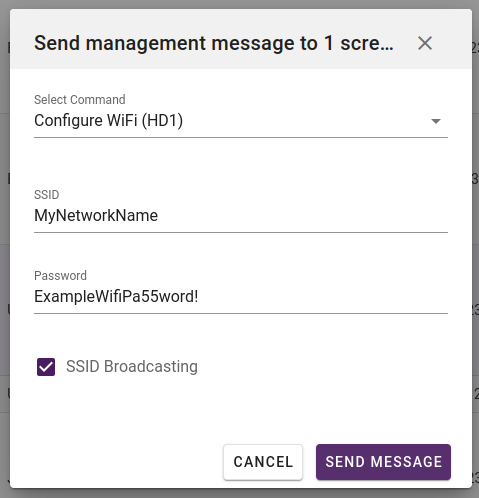
Click on SEND MESSAGE. The player will configure network and connect to the WiFi network. However, it will prioritize the connected network cable over WiFi if both are connected.
¶ Configuring static IP address
This can currently not be set via the portal, so contact support and we will assist.
¶ Configuring screen resolution
The screen resolution can be adjusted using the management portal.
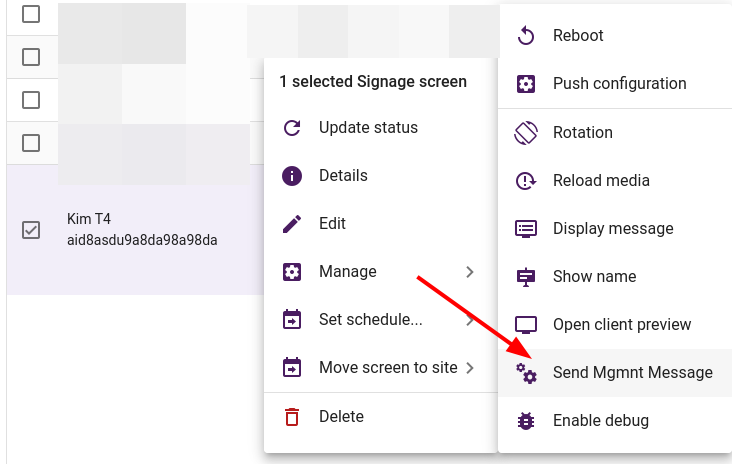
Go to Signage -> Signage Screens -> right-click on the screen you'd like to update and choose Manage -> Send Mgmnt Message
Set the command to "Set resolution", and fill out the two input fields for Width + Height.
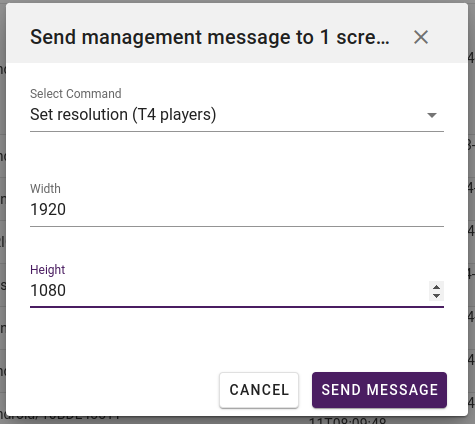
After inputting your desired resolution, click on the SEND MESSAGE button.
Issue a reboot on the player for the new screen resolution to take effect.
¶ FAQ
¶ How do I find the serial code of my HD1 device?
From the management portal, right-click on the signage screen and press Manage -> Show name.
The screen will show a textbox containing the serial code / device id.
If you have a keyboard connected to the player, you may also press the F6 button to show the device iD.
¶ Sound doesn't work or plays on the wrong device
If you have several devices connected to the device, audio output might be playing on the wrong device, or you get no sound at all.
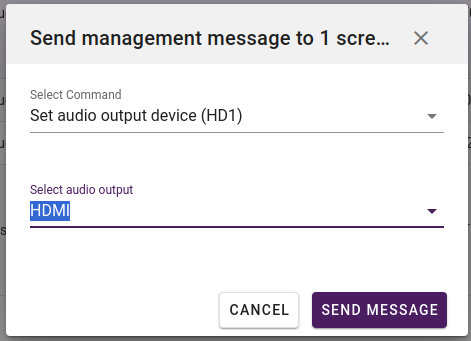
To fix this, you can override the audio output by sending a management command from the portal to force audio output to HDMI, 3,5mm AUX (Minijack) or USB devices.
Go to the Signage screens view in the portal and right-click on the device and choose -> Manage -> Send mgmt command -> Set audio output device -> select preferred audio output and press SEND MESSAGE.
¶ Black screen with no content
This may be due to no internet connection. If you don't have any ethernet cable available, press the F2 button to open WiFi settings and configure a connection, then reboot the player.