¶ Customization Guideline for the Hyatt Regency (2026) theme
This guide provide you with assistance on how you can modify the 2026 version of the Hyatt Regency brand theme. The guide will focus on Regency specific details only, please consult the standard Hub docmentation and base theme docuymentation for a more general understading of how to work with Hub Themes. For any other Hyatt hospitality brand, please use the global Hyatt theme, this is for Regency properties only.
The theme contain an example structure populated with example content. You must modify the existing structure and replace the text and images to fit the local needs.
This theme will be continually supported and updated by Uniguest, a revision log will be noted at the bottom of this document.
¶ Description Notes
THE PROVIDED CONTENT:
-
The theme contains all potential types of pages, please remove any that are not relevant for the deployed property. E.g. remove unsupported streaming services and remove any main menu items not in use.
-
The menu structure is provided as a starting point and as a suggestion only, each property can adjust according to their needs, e.g. amount of information and preferred highlighted features.
-
Content images and text is provided as placeholder examples only, please replace with location relevant material.
TINTS & GRADIENTS:
- Note the use of a purple tinted overlay in the top of main/subpages, these are automatically layered on top of the sele3cted background image. No action required on your part.
FURTHER INFORMATION:
Please consult the general documentation on customizing Hub themes, or contact Uniguest Support for tech support.
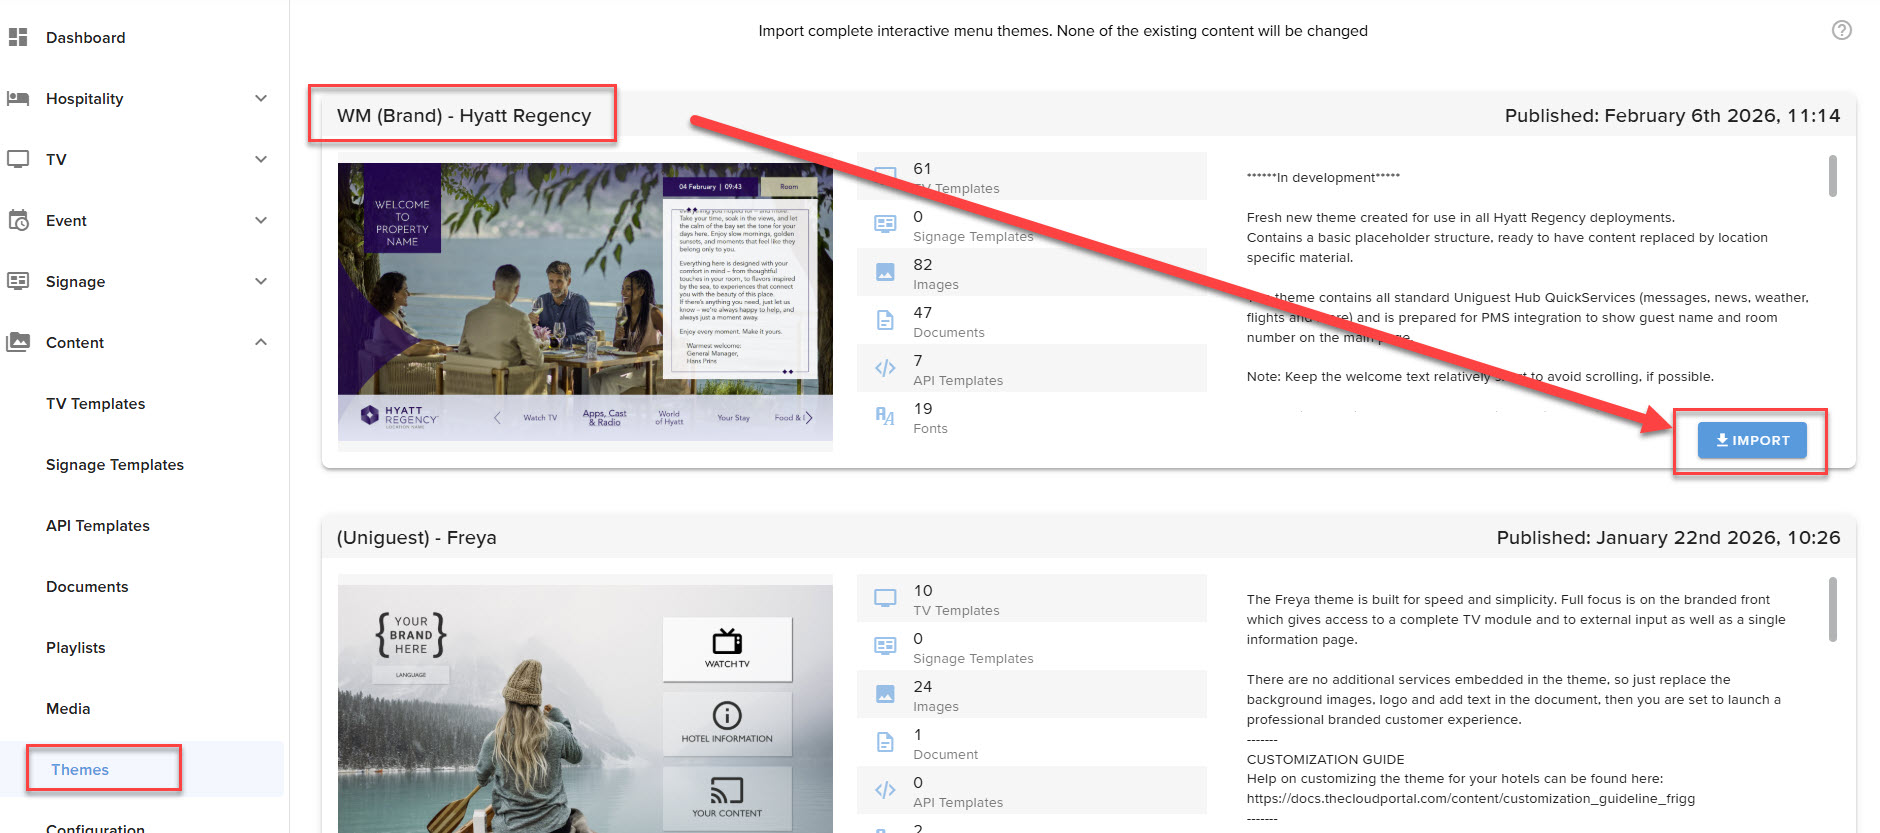
¶ Import the Theme
Start by importing the "WM (Brand) - Hyatt Regency (2026)" theme to your site, if this is not available to import then please contact Uniguest Support.
¶ Customizing the main menu
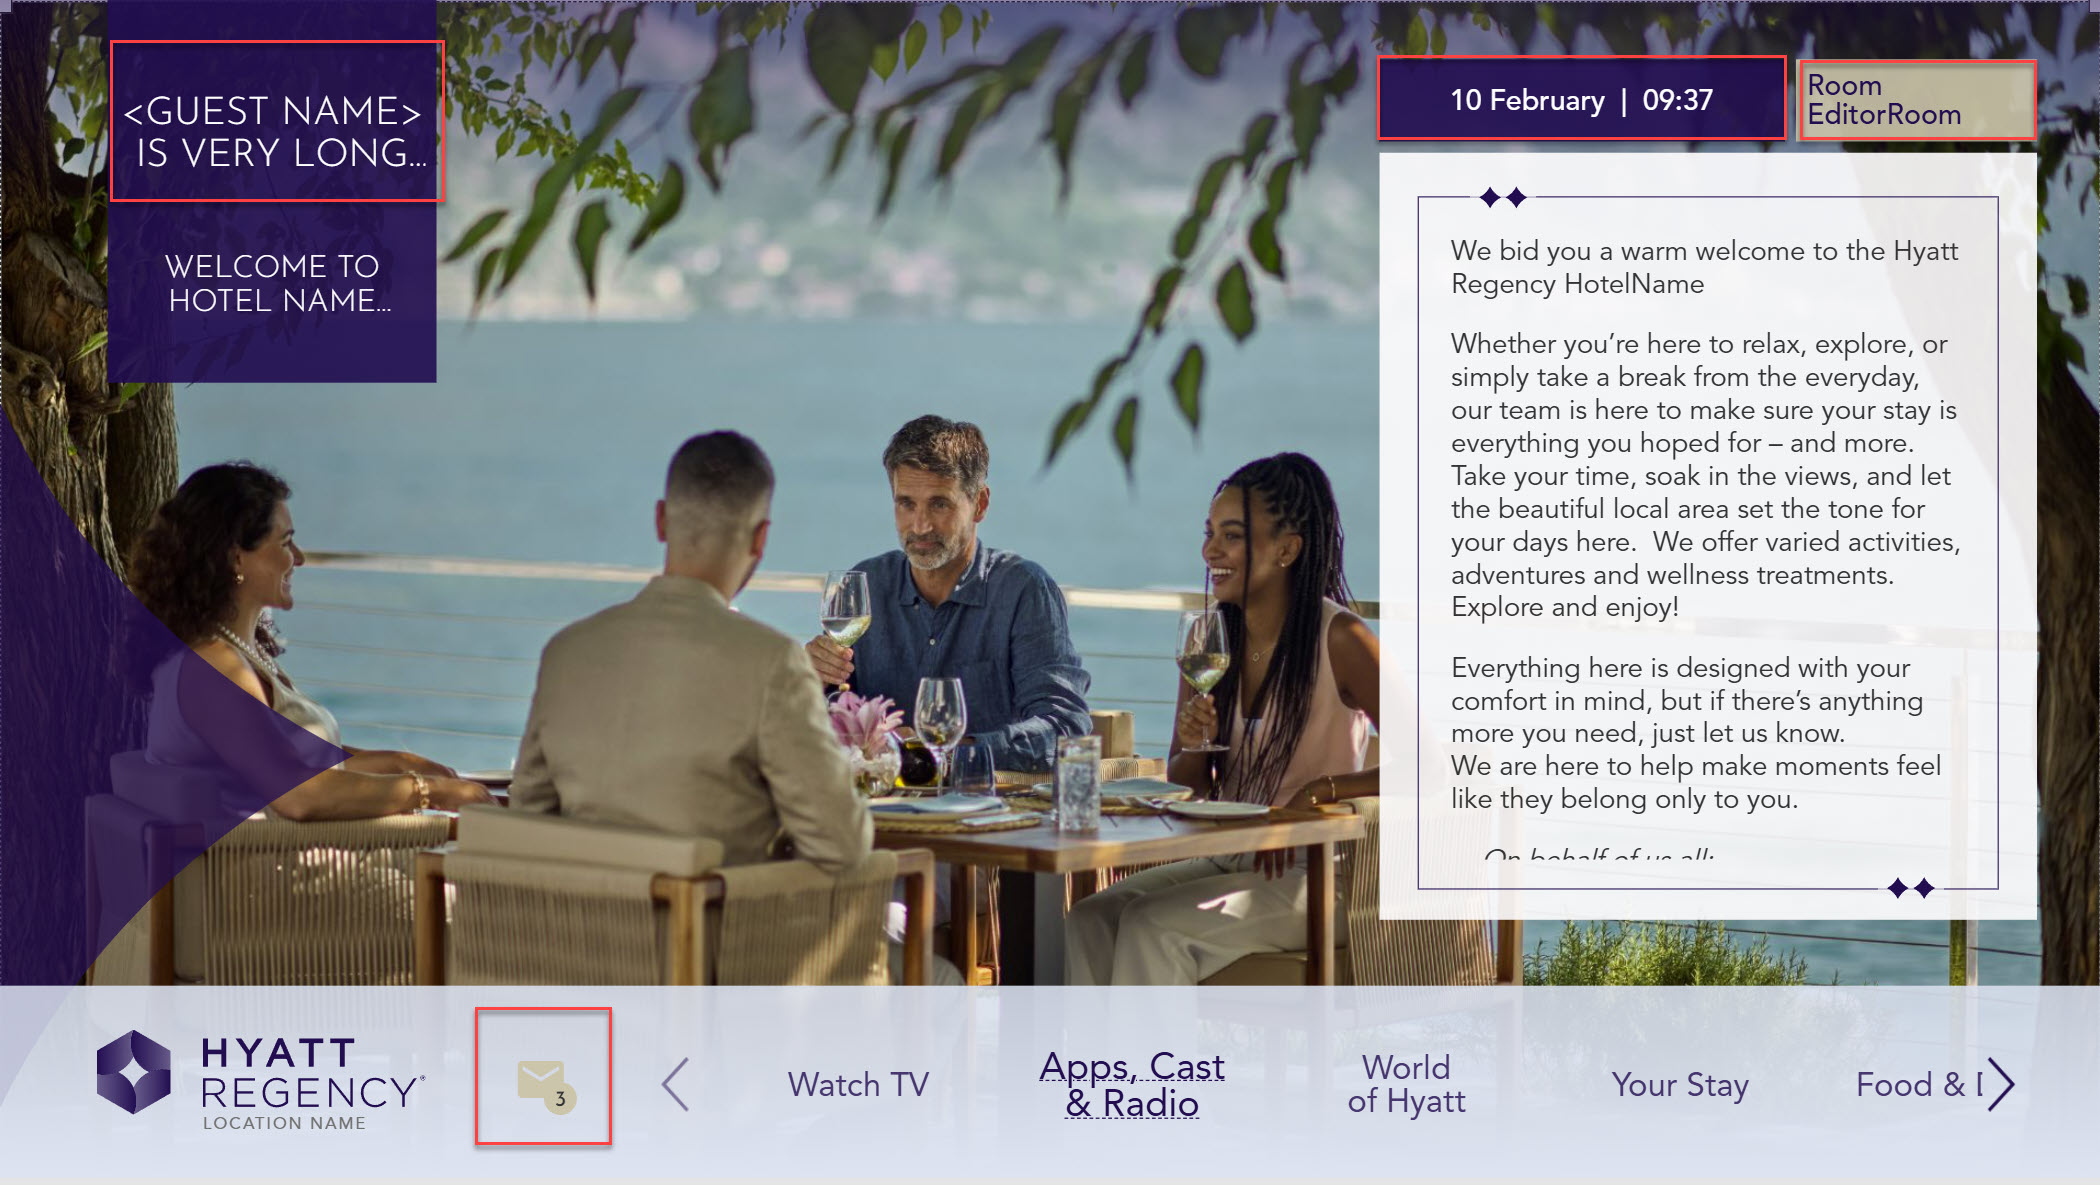
The main menu is the central page that the user always starts from and returns to when navigating the menu structure. The general page layout is mandatory, but you should change the background image and add/remove menu items to suit your specific Regency location.
The main page contains the guest and hotel name in the upper left, a welcome message in the right side, and the main menu in the bottom area. These can/must be populated before deployment. it also contains a time/date area, displays the guest room bumber and the number of unread messages awaiting the guest. These are all populated automatically upon correct PMS configuration.
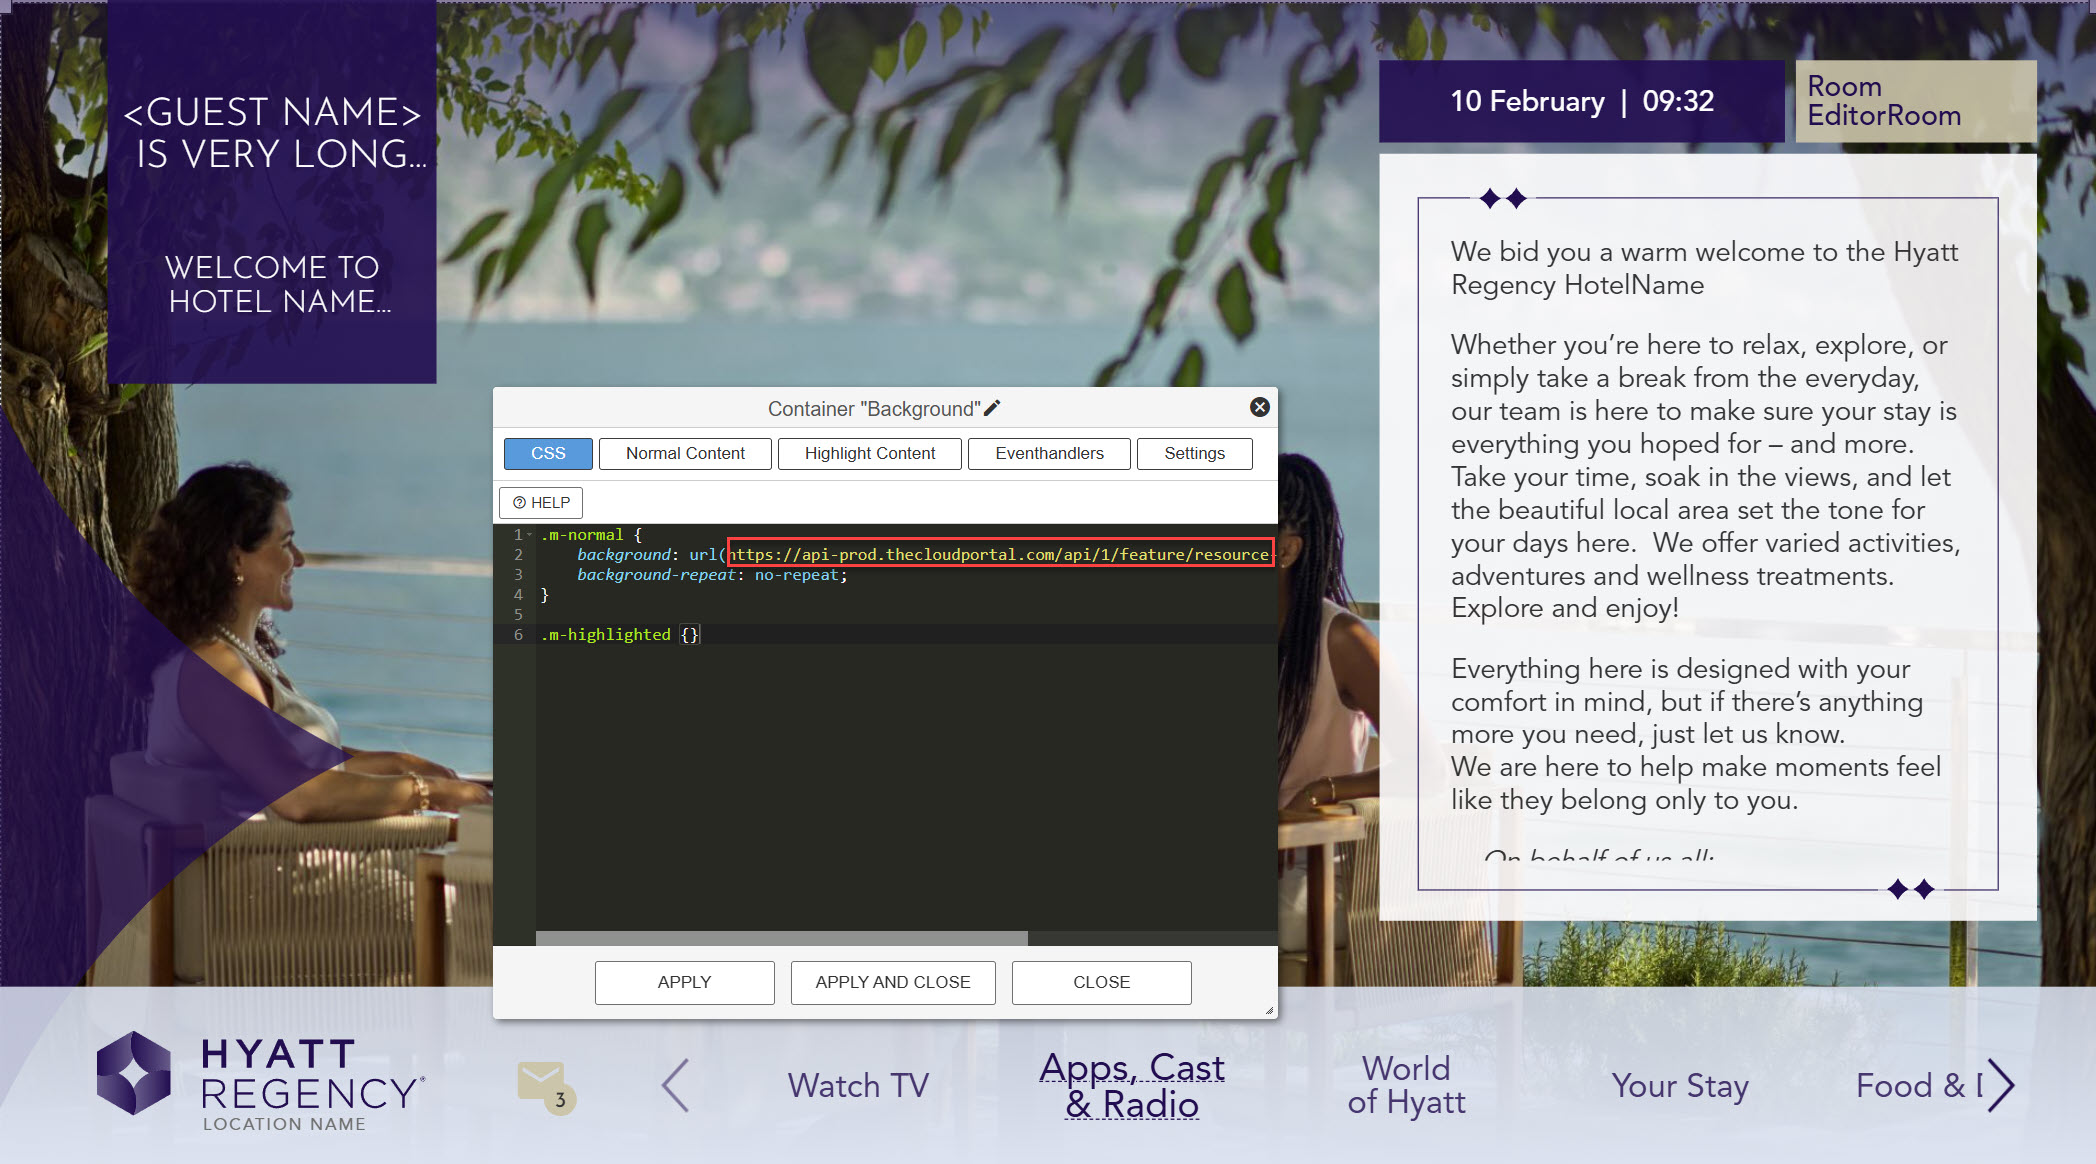
¶ Change the background
Follow Hyatt Regency brand guidelines to create an appropriate JPG image in the dimensions 1920x1080, upload, and implement it by doubleclicking on the background area and replacing the URL
¶ Hyatt Regency logo
The Hyatt Regency logo in the bottom left area of the screen is mandatory and fixed in place, this should not be altered.
¶ Add, modify or remove menu items
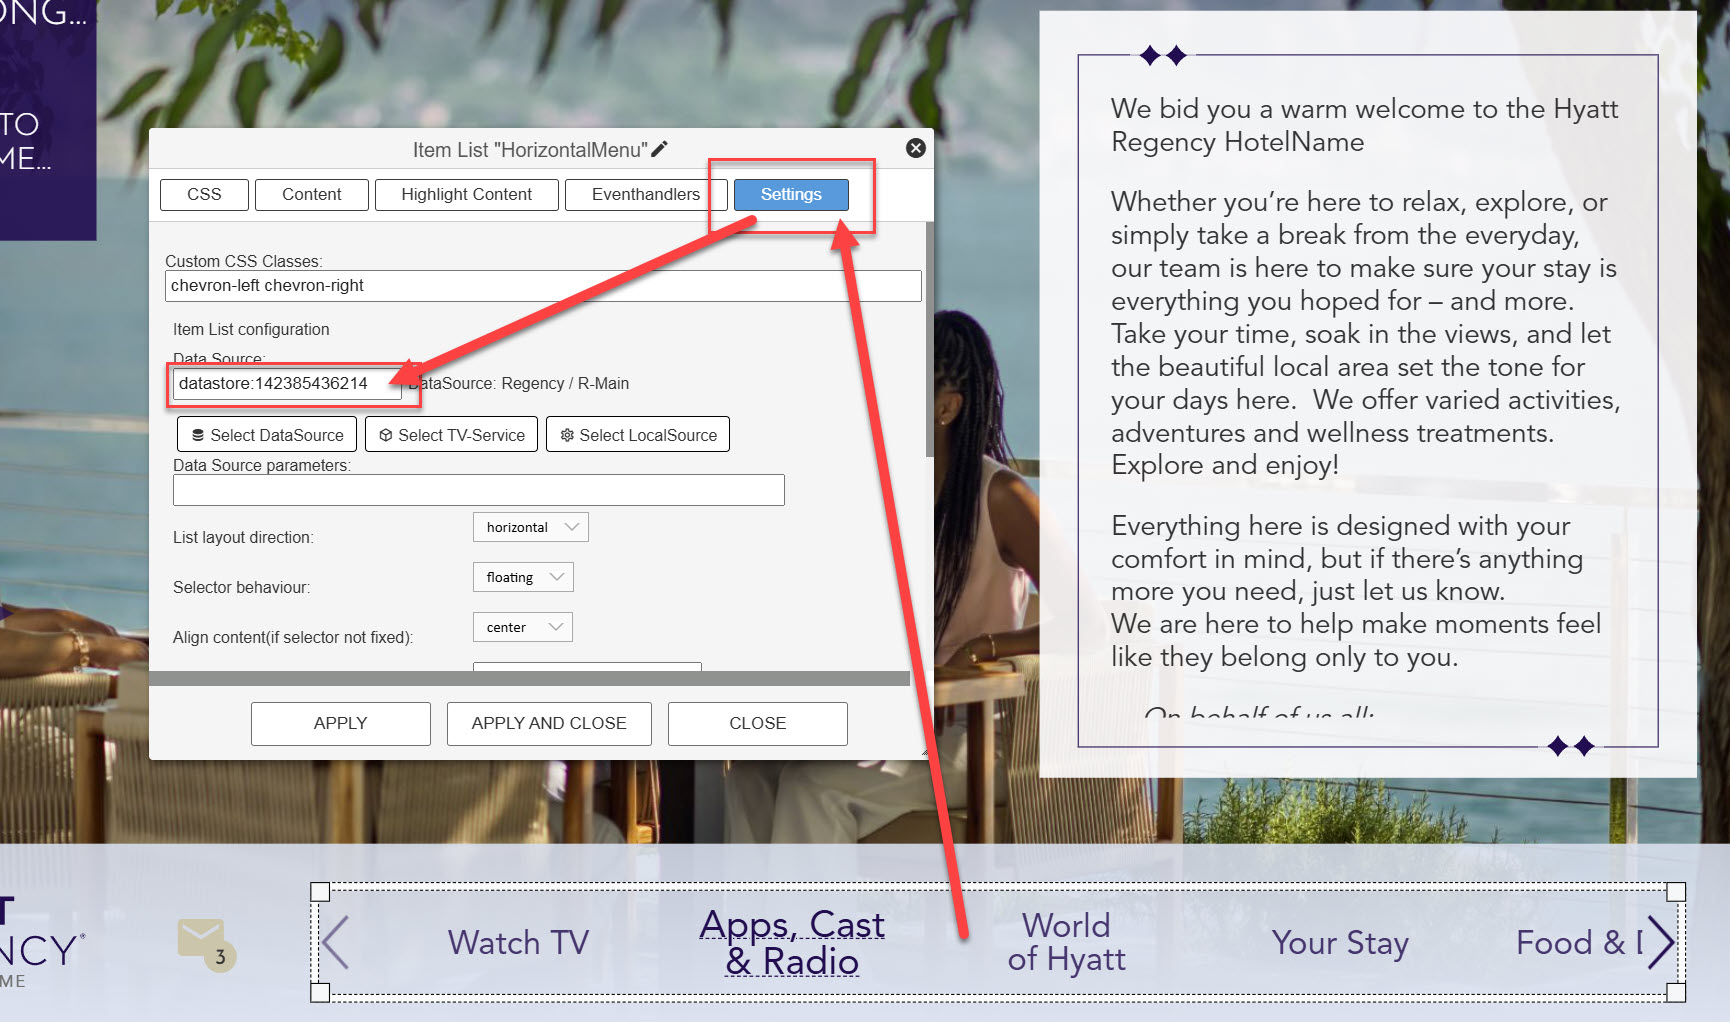
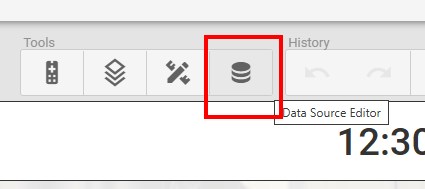
The Menu items are administrated through a Data source. To access this, click the Data source icon in the upper right corner and select the Data source named "Main Menu", see below.
Inside the Data source you can add a new menu item, you can modify existing ones and remove items you do not need. You can also change the order of the Menu items. Furthermore, language translations can be added using the flag dropdown at the top.
¶ Change/translate the welcome text

The message in the right hand side is populated through a document. To add your location specific text, simply update the relevant document.
Language versions are created similar to all other language divided content.
The flags/languages to the left are autogenerated by the system to always display the languages you have activated.
NOTE: Keep the text relatively short to avoid scrolling if possible, butif scroll is needed, this will auto-activate.
¶ Customize the Power On page
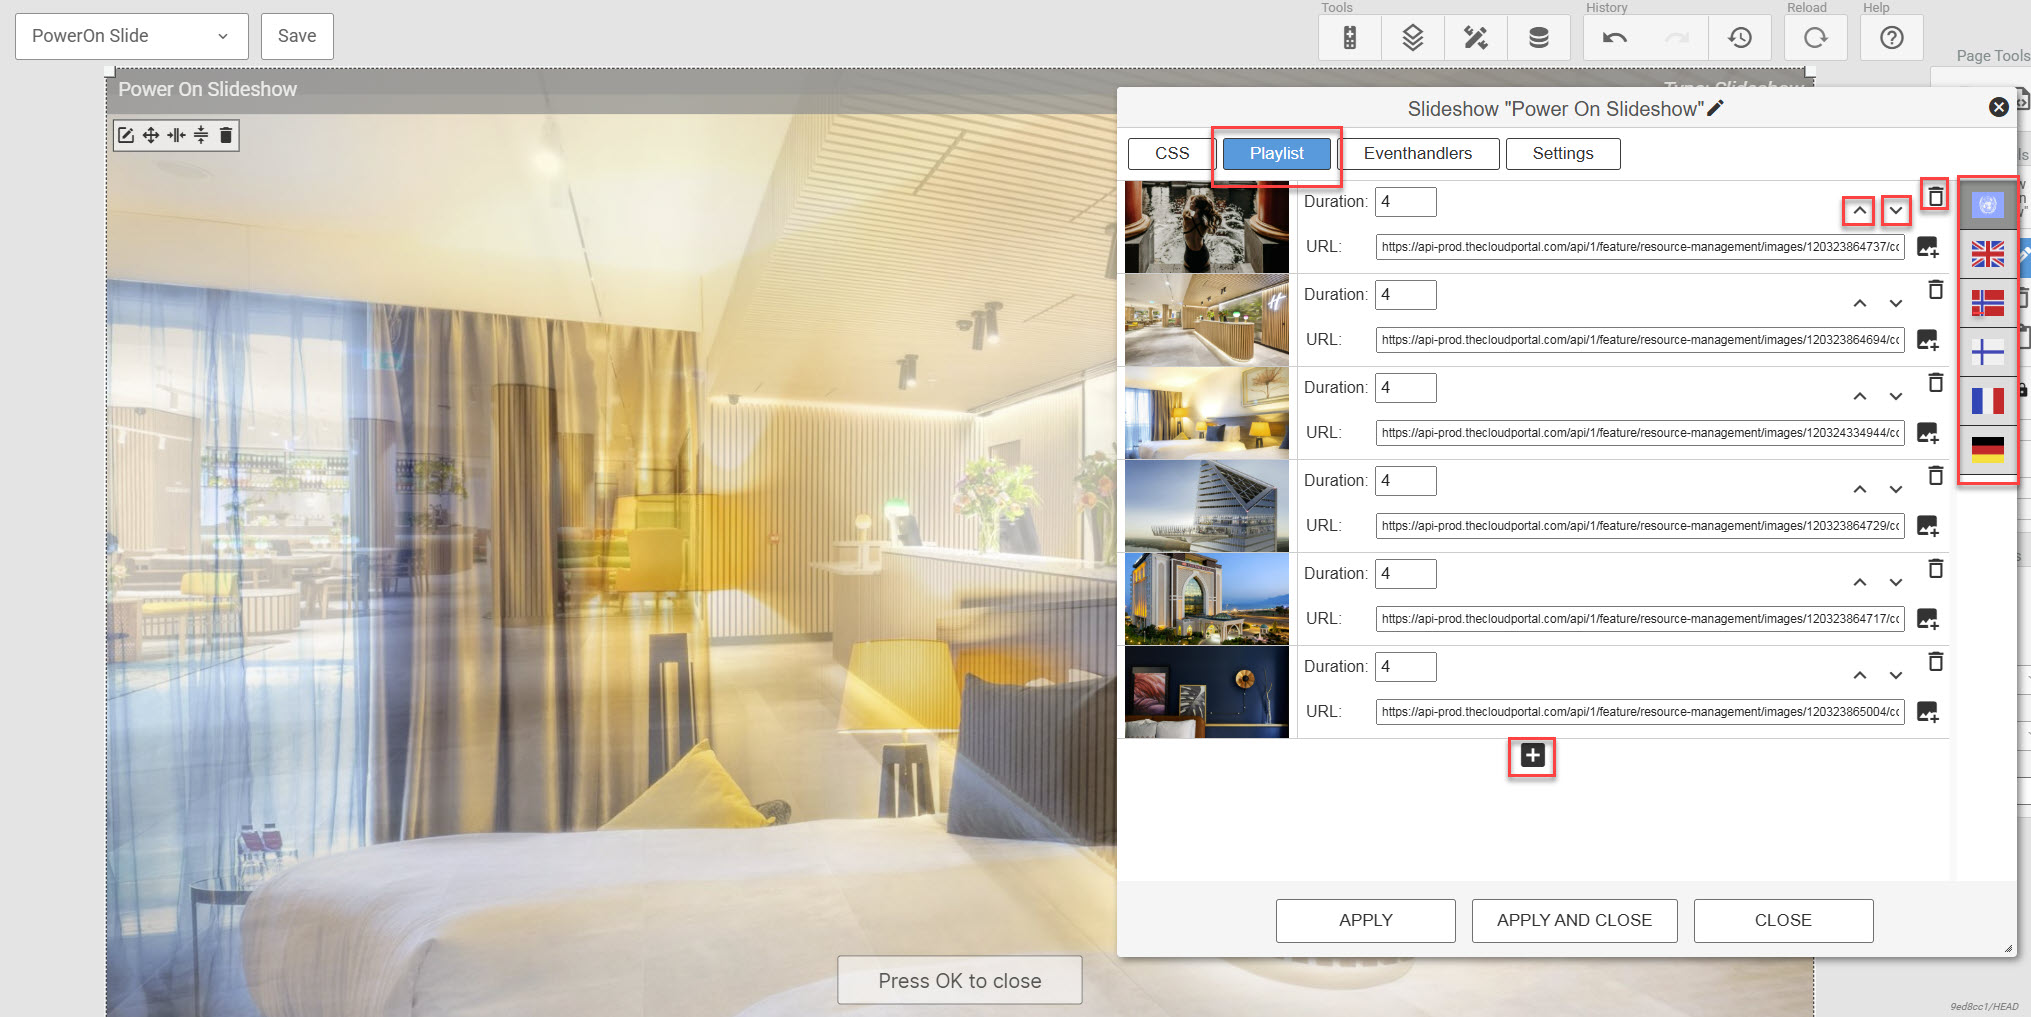
To modify the slideshow displayed when the TV is turned on, open the "Power On" page, doubleclick the main element and slect the "playlist" tab. There you can add, replace or remove images uploaded to the media gallery. As with most other elements you can differentiate between content for different languages through the UI flags in the right side.
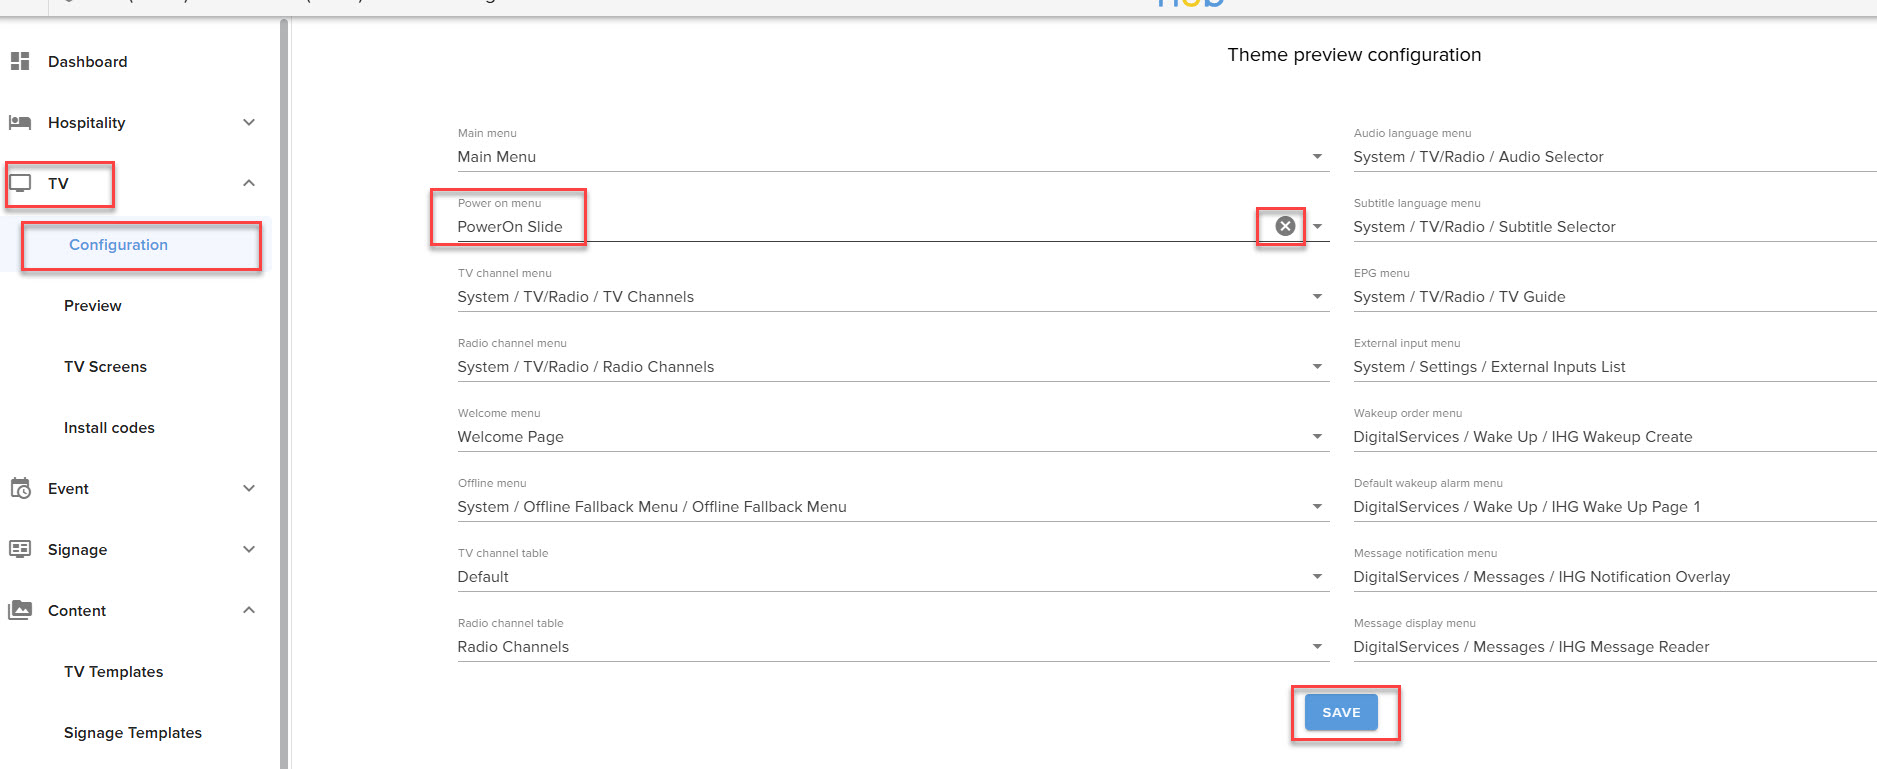
To entirely remove the Power On slideshow, go to TV -> Configuration and remove the selected "Power On" to leave it blank.
¶ Customize a Sub Menu
Submenus in this theme are set up with a background image, a headline and a data source containing the submenu items. This format is mandatory and uniform across the site and if you create new submenus these should follow the same form.
¶ (1) Change the background
Same procedure as the main page, simply doubleclick and change the URL
¶ (2) Change the headline
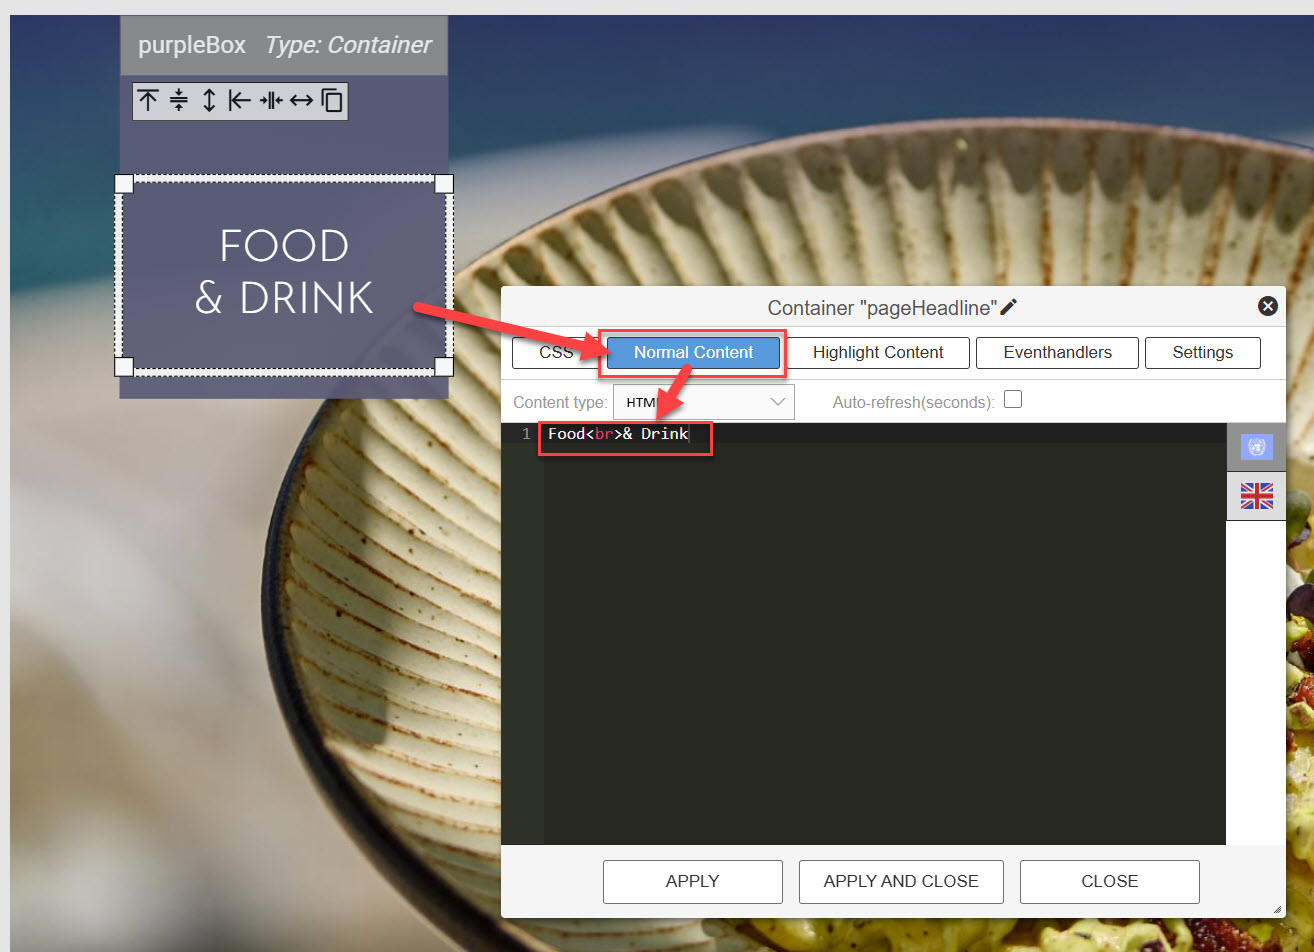
The sub menu heading is modified by opening the container that contains the text. Choose "Normal Content" and change the text. Translations can be added my using the flag icons on the right. Please note the limited space available for the headline and keep any text quite short in all languages.
¶ (3) Change the elements in the Sub Menu List
Same procedure as the main page.
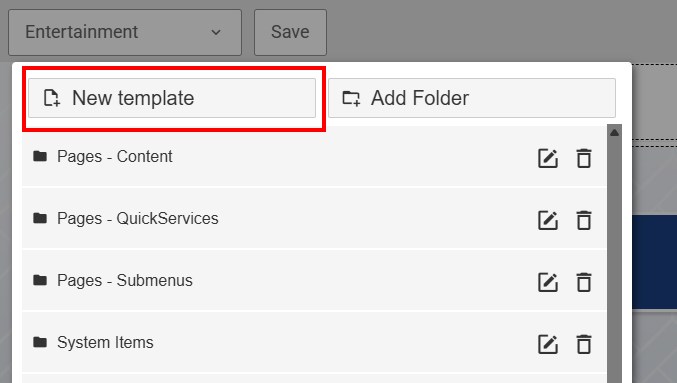
¶ Create a new Sub Menu
If you want to create a new sub menu, simply create a new one as a copy of an already existing one:
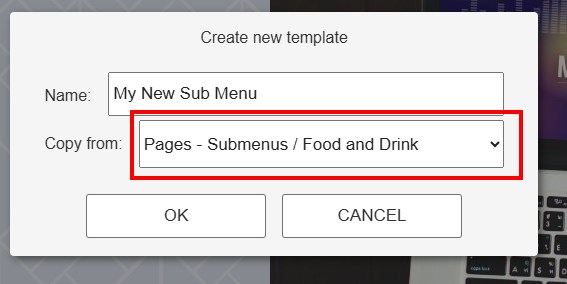
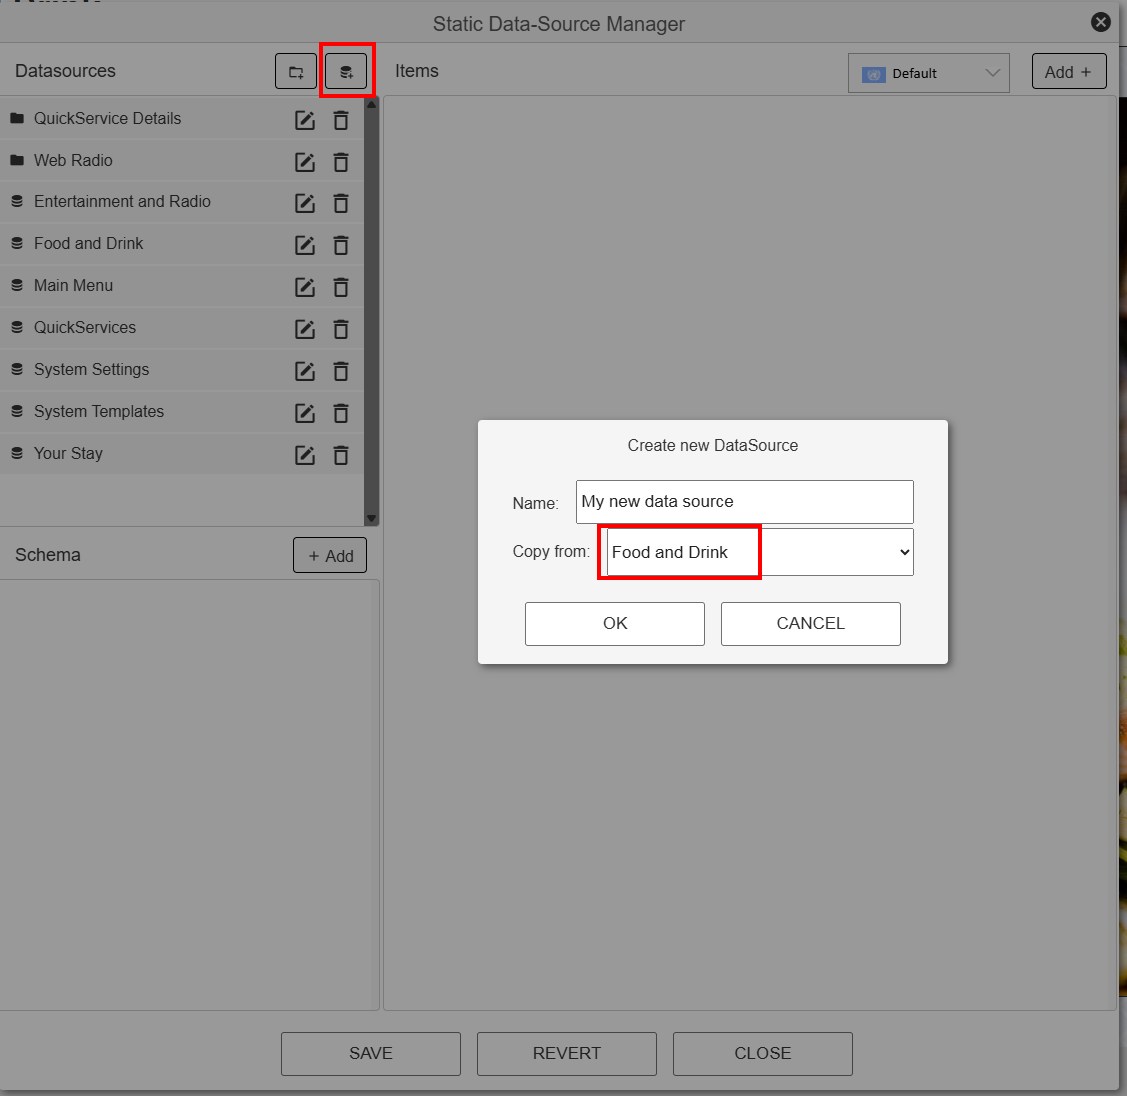
Now you need to create a new data source to fill the sub menu with your menu items. Within the data source editor, you can create a new datasource as a copy of an existing one. This ensures it contains the correct fields needed for the sub menu:
Now you can link the new data source to your new submenu page:
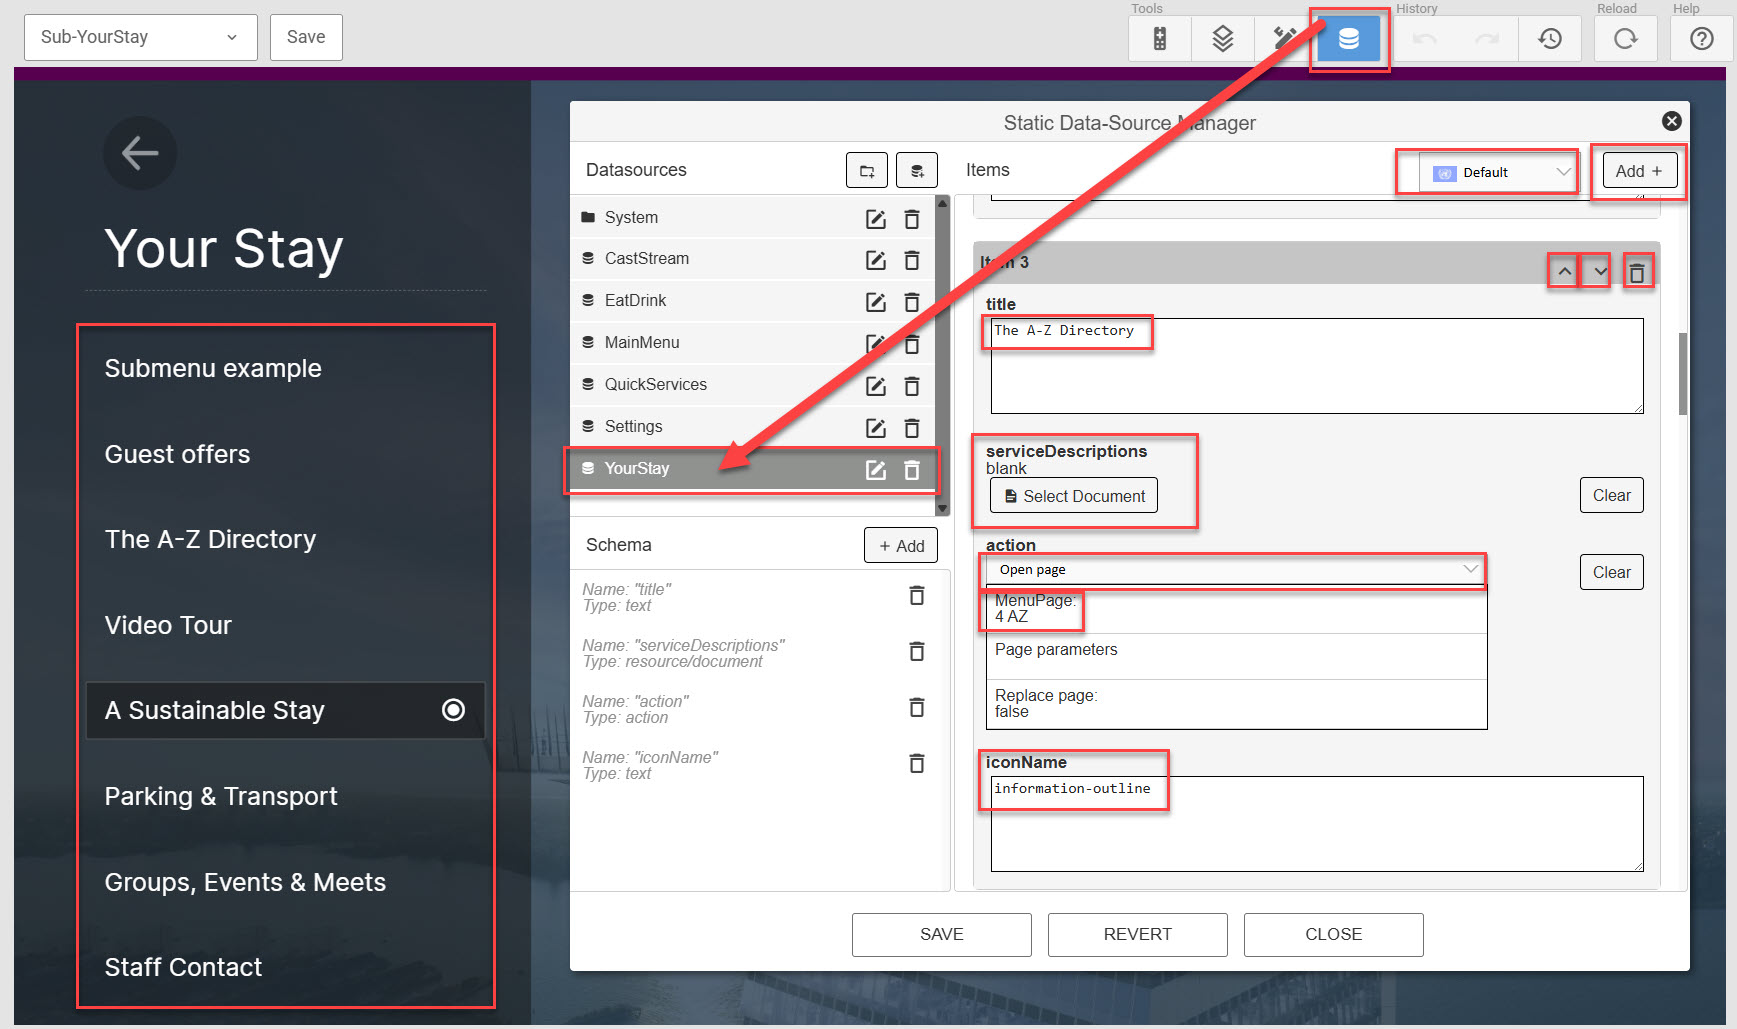

Then map and configure the new page as described in the Main Menu and Sub Menu configuration sections above.
¶ Customize an existing Info Page
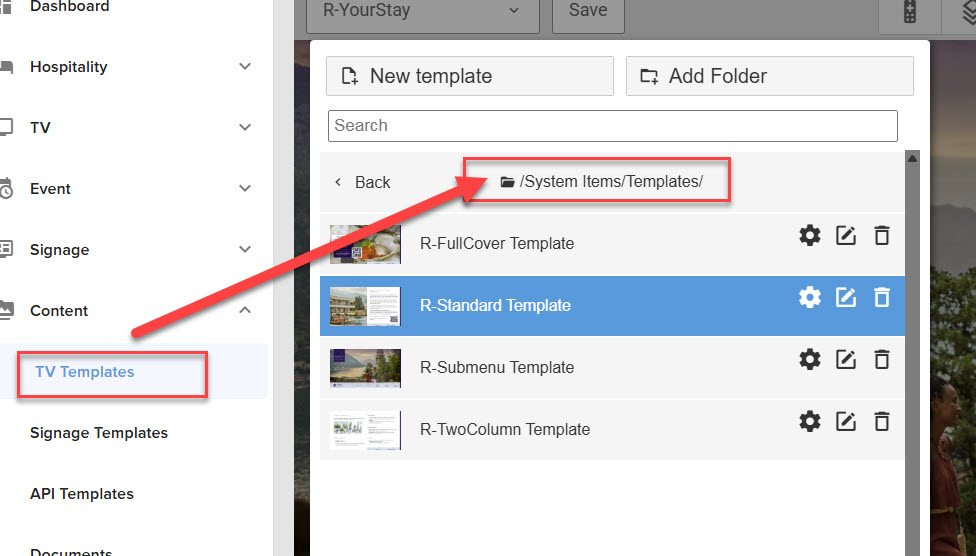
There are three info-page layouts supplied in the theme. You can use each, mix them or stick to one uniform look. The infopages are "standard","two-colum" and "full cover", clean base files for each can be located in the template folder.
The provided information pages are placeholders only, you must replace all content with what is relevant for your deployment. Add new, remove, change or adapt.
For information on how to work with images and documents, please consult the general documentation on working with Hub Themes.
¶ "Standard" page customization
To change the left side page image, double click the container containing the image. Within the CSS section, change the url for the "background-image". This is done by deleting the old one and inserting a new one. Right-click within the url() and select the new image.
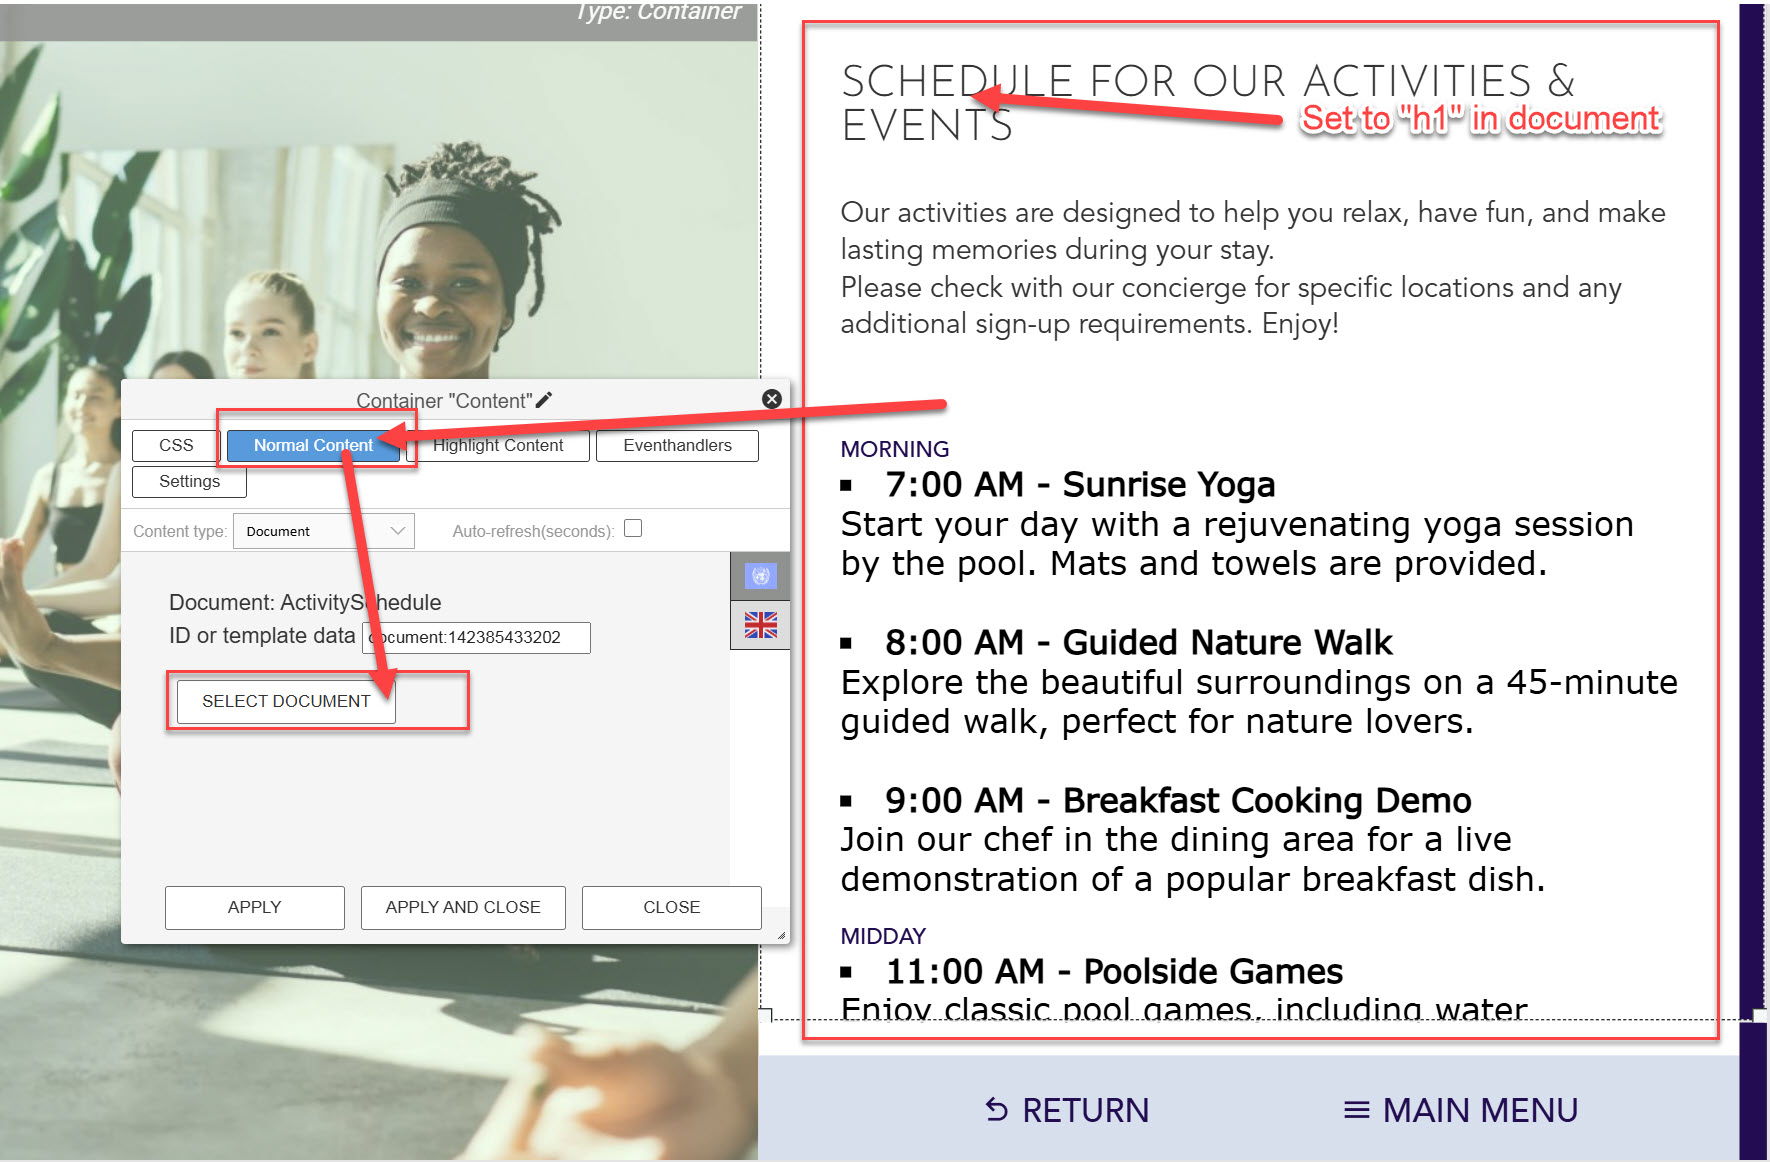
To change the page content area, doubleclick and select "normal content" for information on the document and/or to change the source document.
¶ "two column" page customization
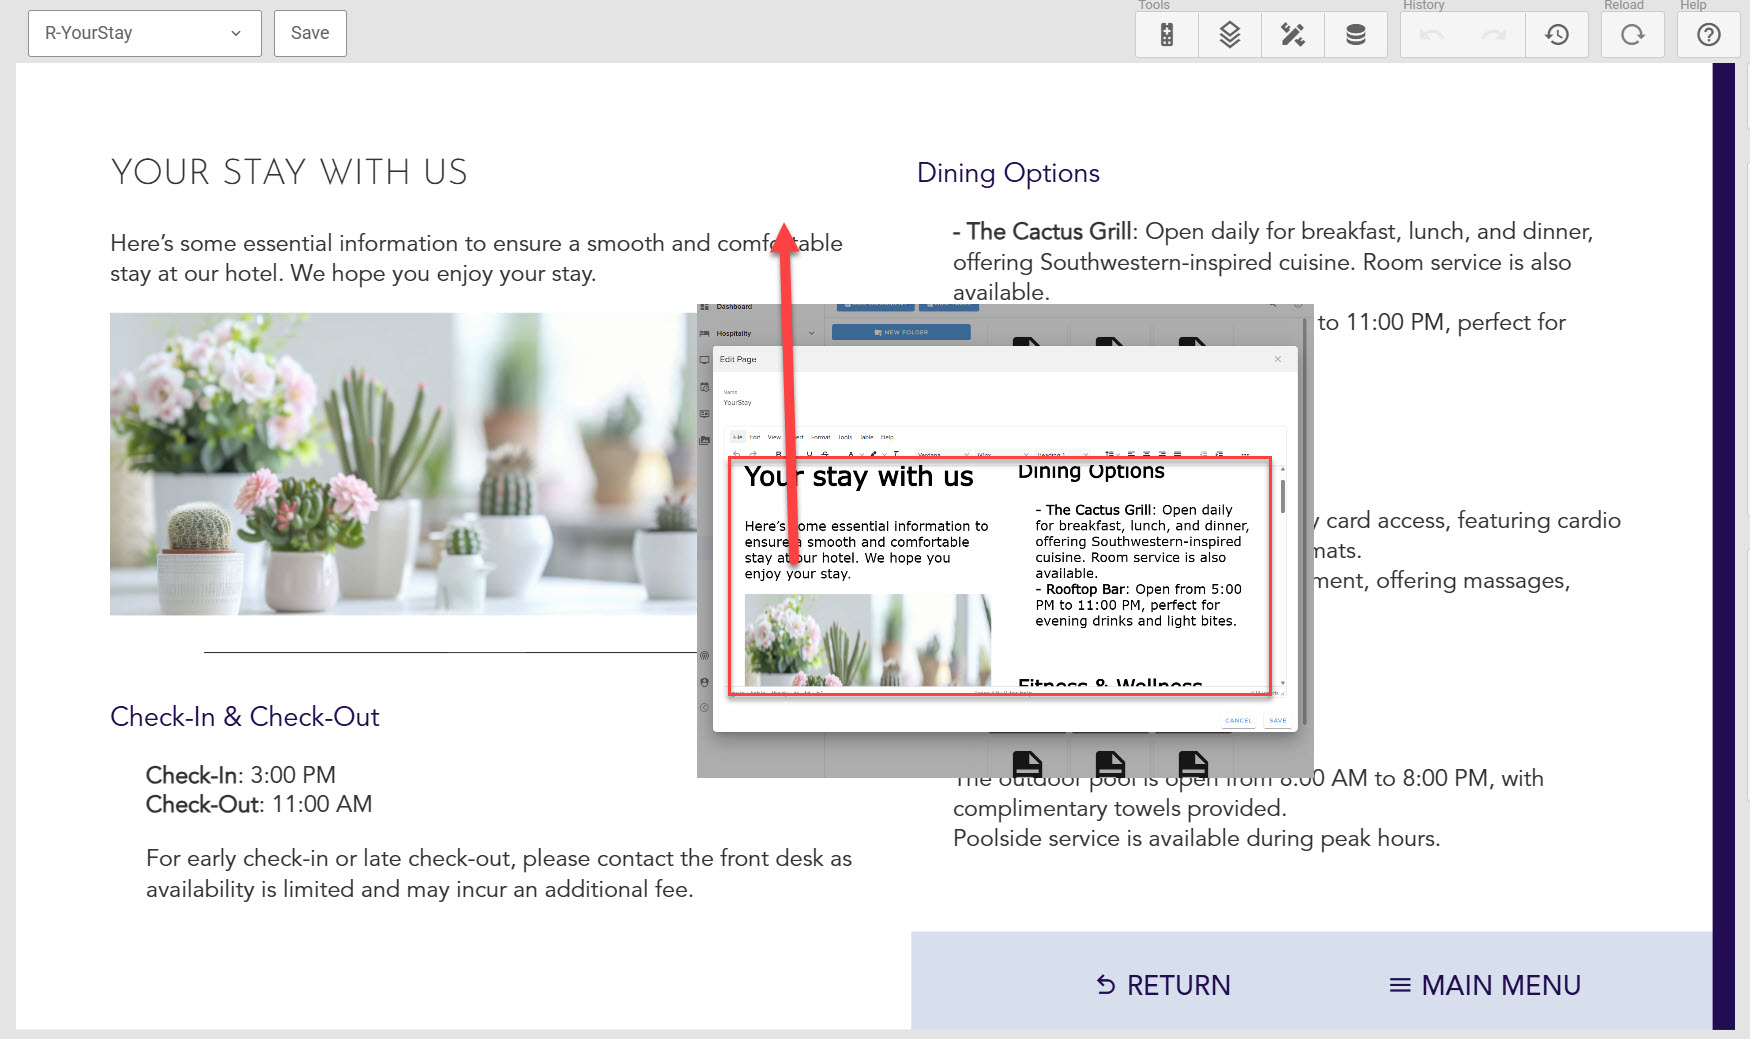
This layout suits large amounts of information by removing the left side image and instead allowing the info document to take over the full screen width. The two columns are dictated by the displayed document, copy/paste the provided example to set up your own versions.
To change the content area, just doubleclick and select "normal content" for information on the document and/or to change the source document.
¶ "Full cover" page customization
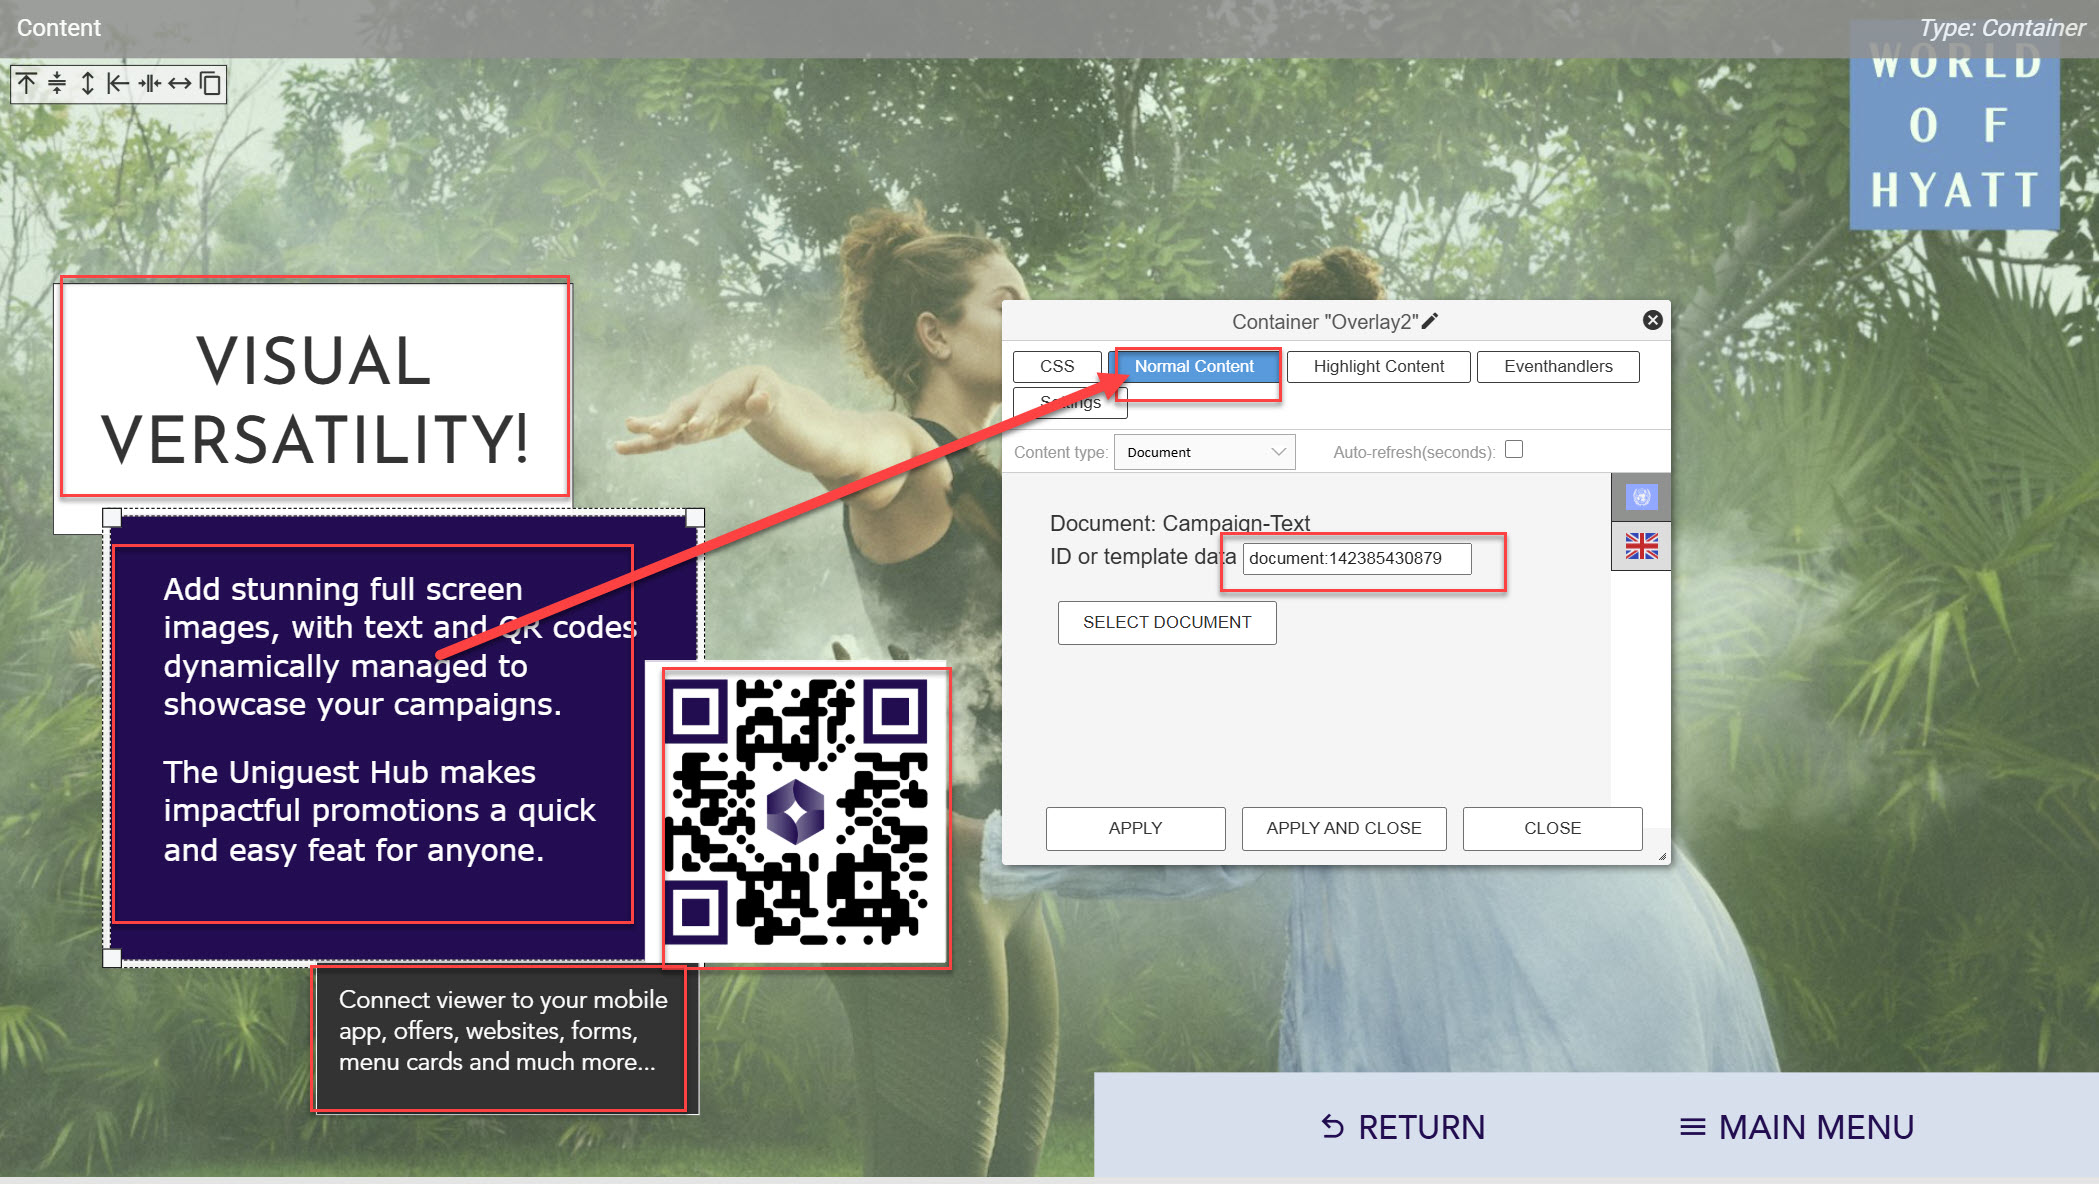
Replace the background image by doubleclicking and selecting a new URL. Same as main and submenu.
Change the content of text boxes by doubleclicking and selecting new documents to display. Change or remove the QR code by replacing the image.
All boxes can be changed, resized, moved or deleted direct in the editor, enabling a super versatile visual page type.
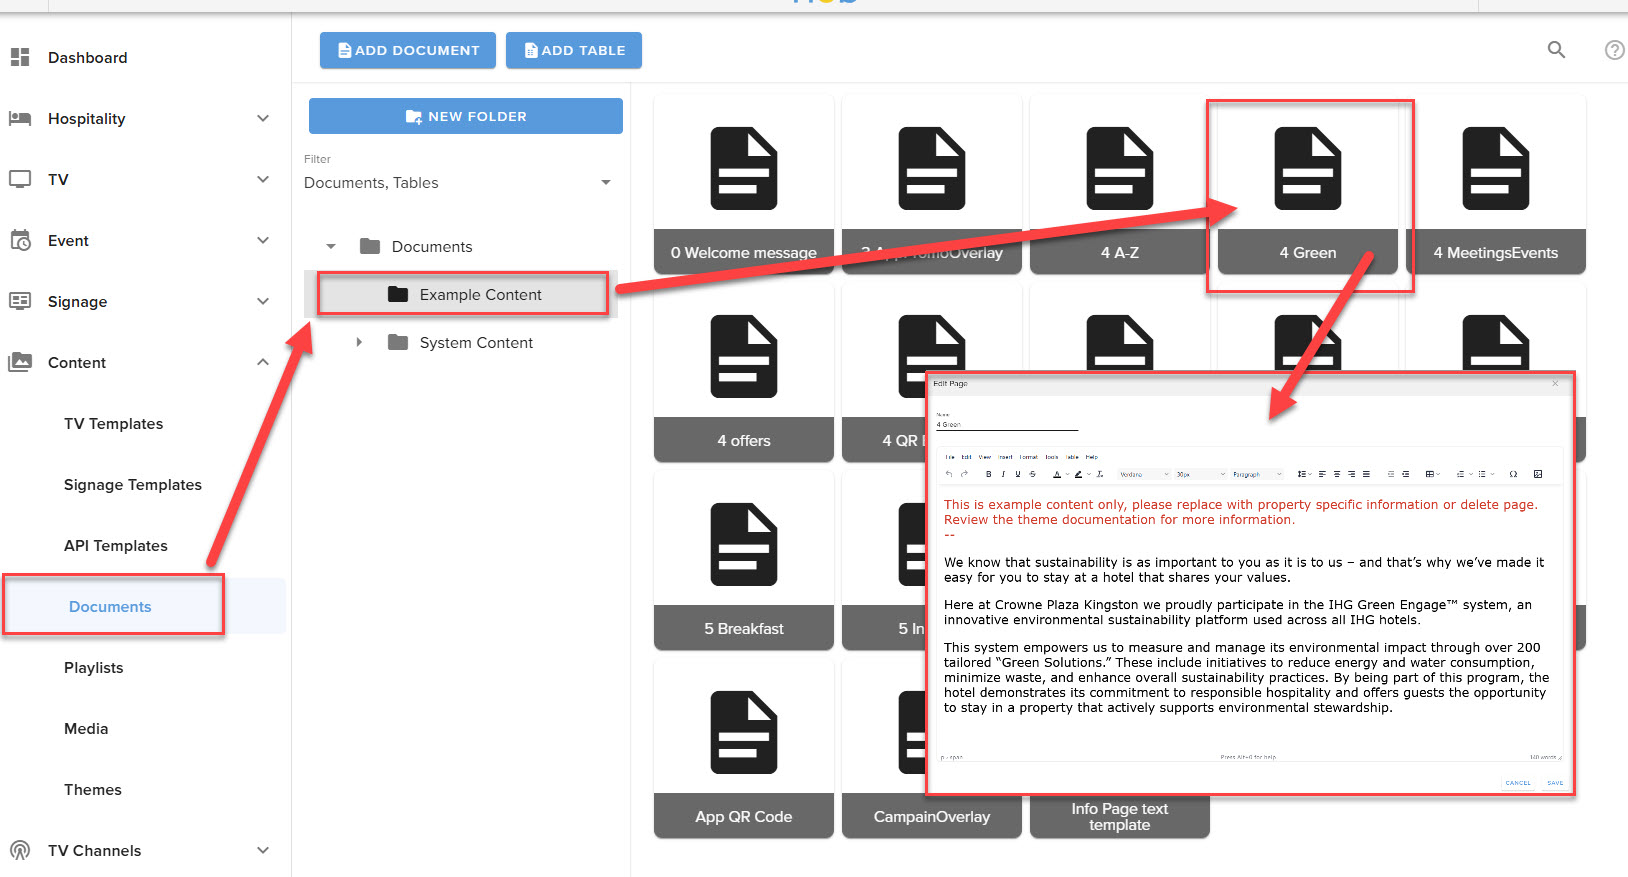
¶ How to change document content
To edit existing document text/images, open the relevant document and use the standard editor to write your text. Note that you should not format the text, this is done automatically by the system when displaying on page.
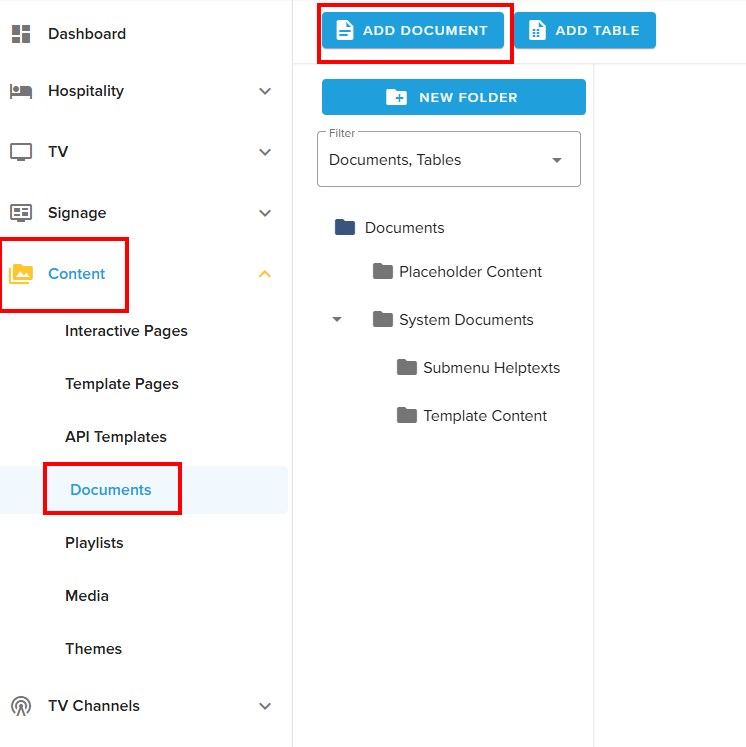
To write new content, create a new document
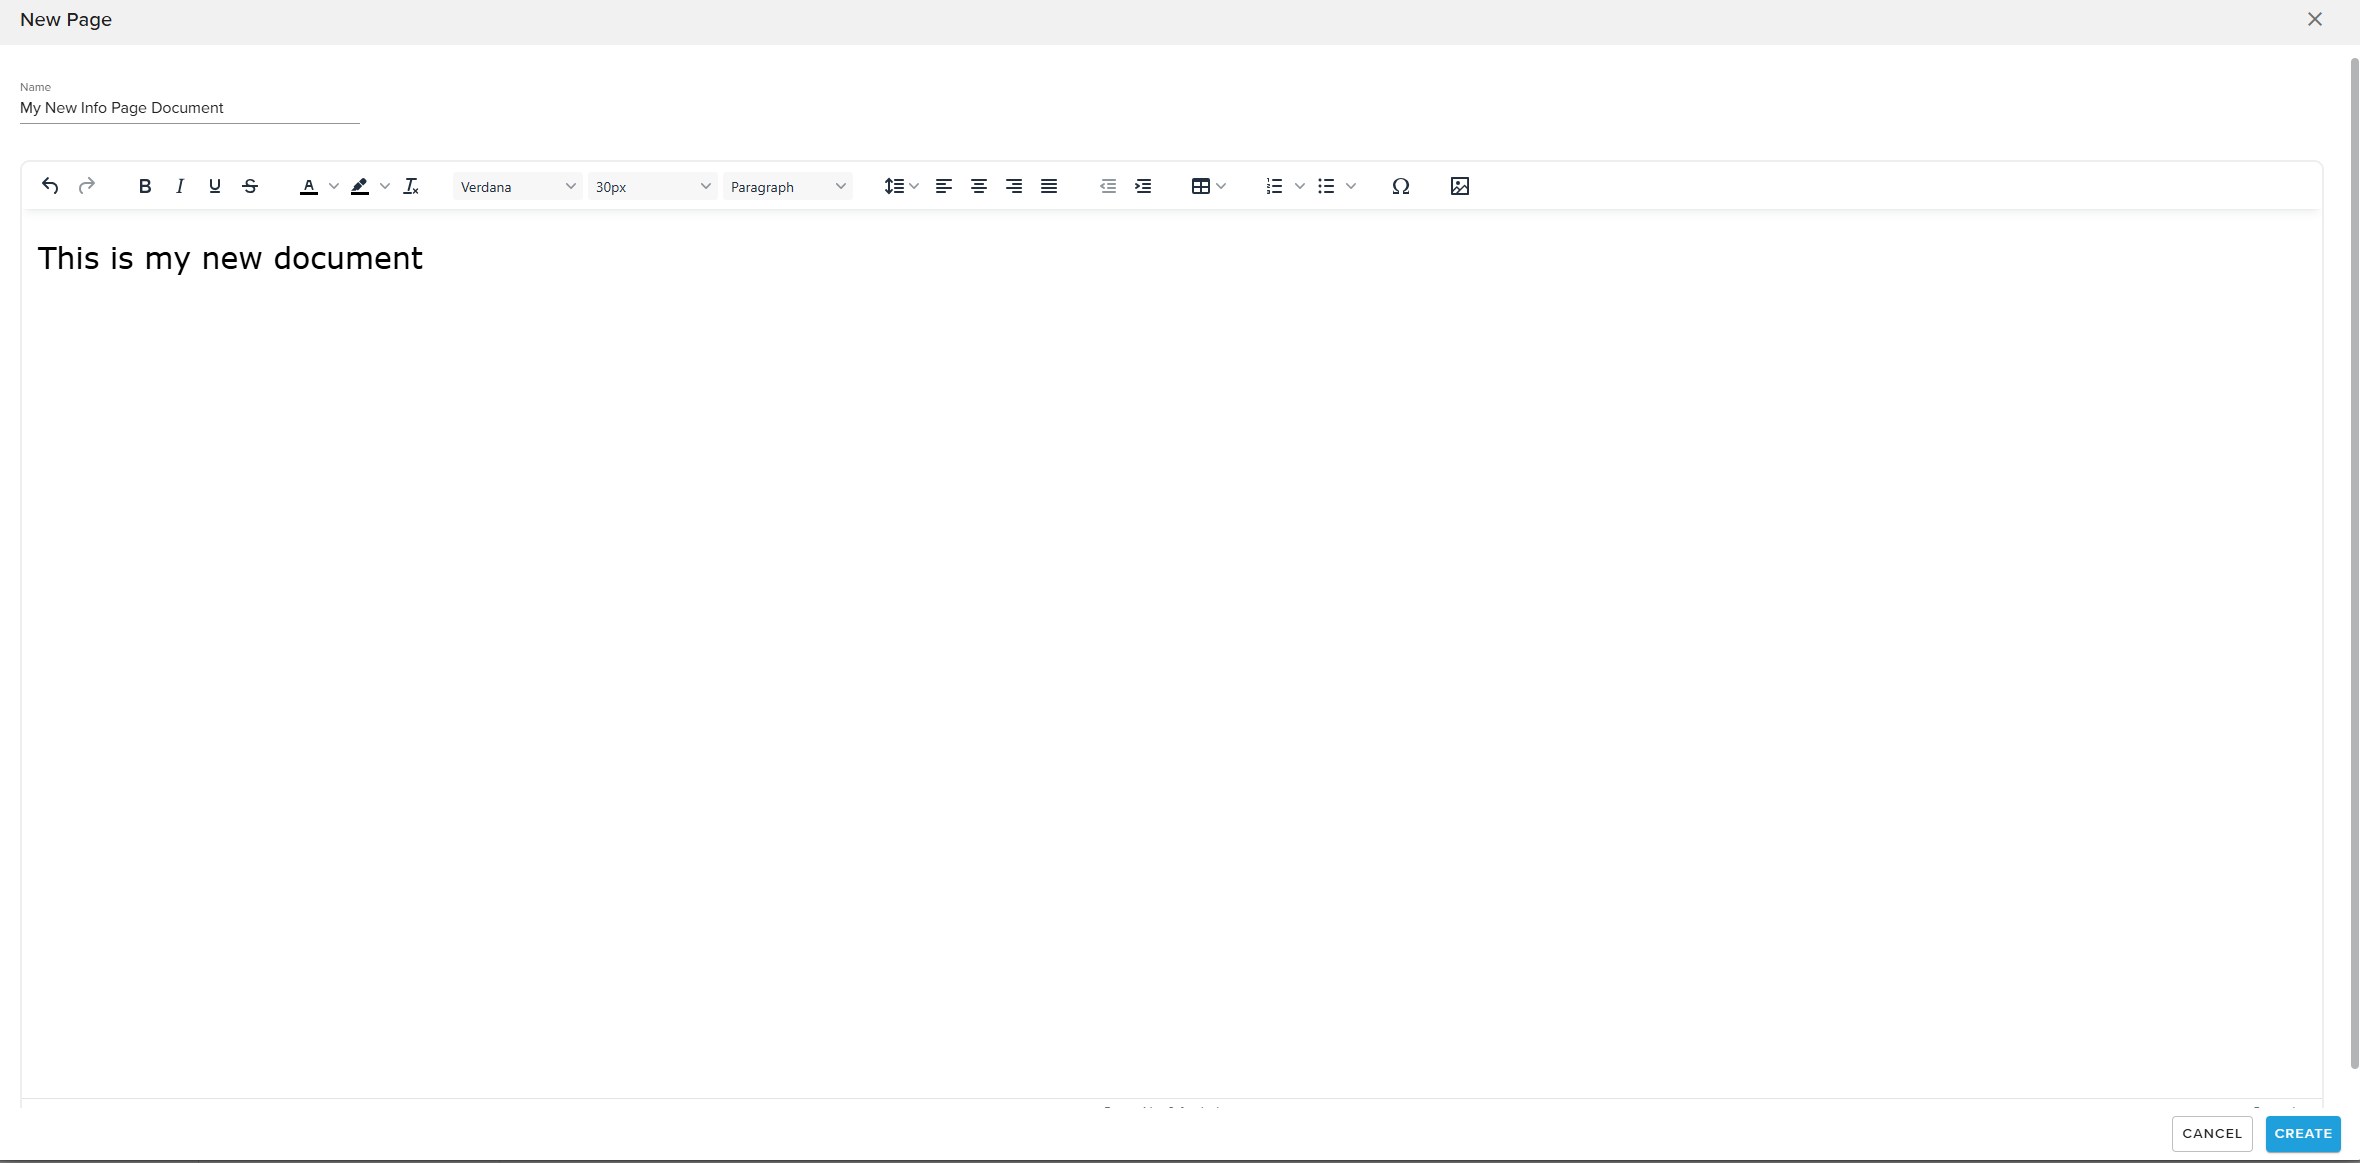
Edit the document per needed. You could copy/paste text from another document as a start for your new document if you want.
To add the content of the new document into the info page, you double-click the "infoText" window on the info page.
Under "Normal Content", select the new document you have created. Use the flags to add documents on other languages. Then press "Apply and Close".
You should now see the content of the new document on the info page. Remember to save the page.

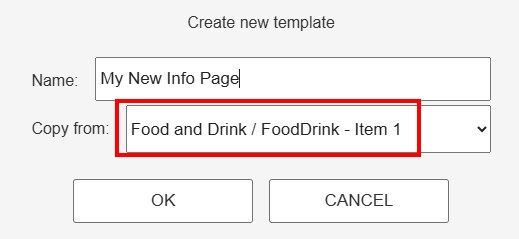
¶ Create a new info page
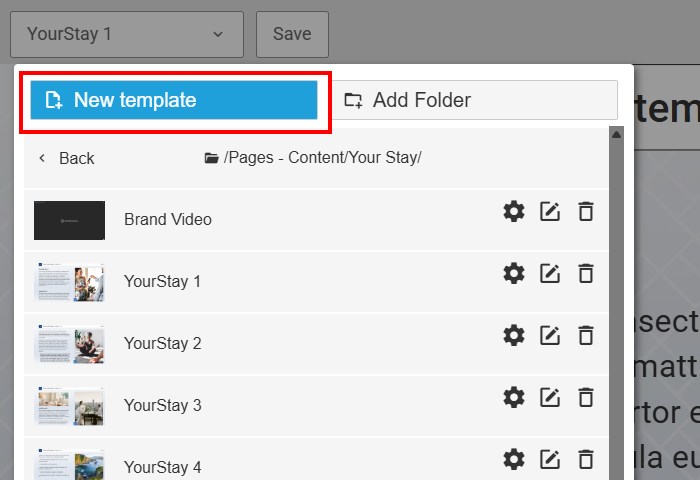
To add a new info page, create a copy of one of the existing ones:
Now follow the instructions in the section "Customize an existing Info Page" above to do the needed modifications.
¶ System Services
A selection of live services are included in the theme, you can remove any services not desired by the property. Some require a correctly configured PMS connection.
They are all found under "Guest Services", below is a quick walkthrough of how to work with each. For more information, please consult the more general documentation on working with Hub Themes.
¶ Configure the Wake-Up service
To configure the wake-up service for each hotel, open the "Wake Up Alarm Page 1" page and then the "Overall page settings":
In the eventhandler for "Every time the page is displayed, set the correct media source to play in the background on the wake-up. The audio settings can also be adjusted there.
Do the same procedure of defining the media channel on "Wake Up Alarm Page 2" (On this page there is no audio config).
Remember to test on-site that the wake-up is working properly.
¶ Adjust the weather locations
¶ Weather location on the main menu page
To change the location of the weather widget on the main menu page, open the API template "Main Menu Weather Widget".
Inside the "Fixed paramaters", the latitude and longitude of the location can be set. You can also toggle between Celsius and Fahrenheit.
¶ Weather locations within the Quick Services submenu
To add or remove locations to the weather list, open the "Weather" data source within the "QuickService Details" folder. Configure the name/latitude/longitude for each location:
¶ Configure the News feed
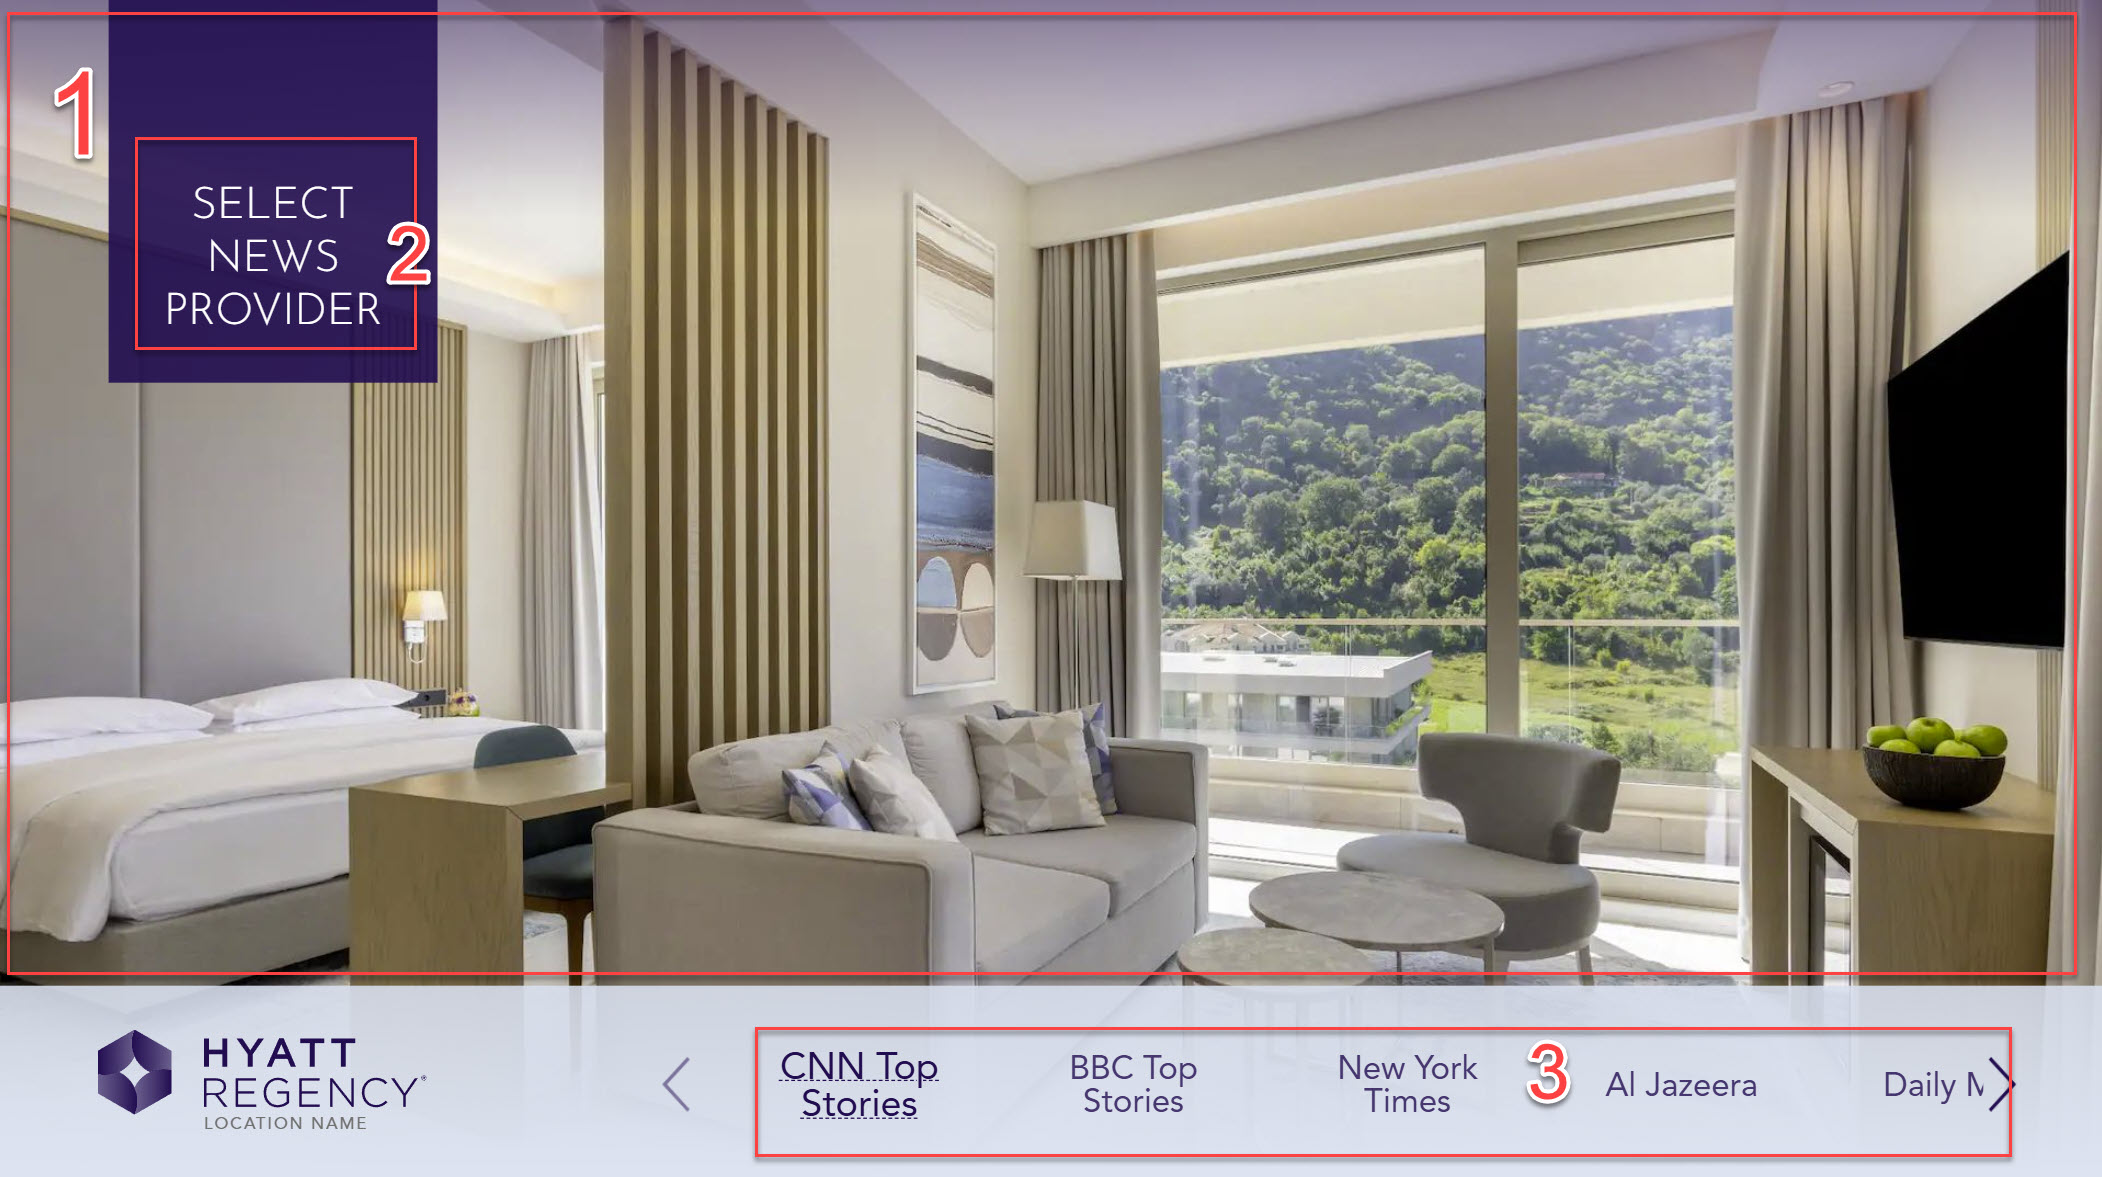
You can configure the News feeds showing in the News menu:
The News sources are configured in the data source called "News Sources" within the "QuickService Details" folder. Here you can add sources to the list by using the "Add" button. You can delete items by using the recycle bin button. You can also change the order of the items using the arrow buttons. Add title, url and limit=15 for each item, as shown below:
¶ Configure Flight locations
The Hyatt theme has a flight template included. However, please note that an extra license is required to enable this service. Please contact your sales representative for purchasing this license.
¶ Enable the flight pages
The Flight pages are disabled by default, since using these require an extra license, see above. If you have a valid license, you can enable the pages by entering the "Quick Services" data source. In the "Flight" item, set the "action" paramater to "Open Page" and set it to open the Menu Page "Flights List":
¶ Change the list of locations
The list of locations is configured from the data source called "Flights" within the "QuickService Details" folder. Here you modify the items to contain the name(s) and the IATA code(s) you want to include:
¶ Set up Web Radio categories
The Hyatt theme includes a web radio service with a few default categories. The default categories can be modified or deleted, and new categories can be added.
¶ Define a new web radio category
The various web radio categories are defined in different data sources. See as an example the "Classic Rock" data source below:

To define a new category, you could either edit an existing one or create a new. This exampel will show how to create a new.
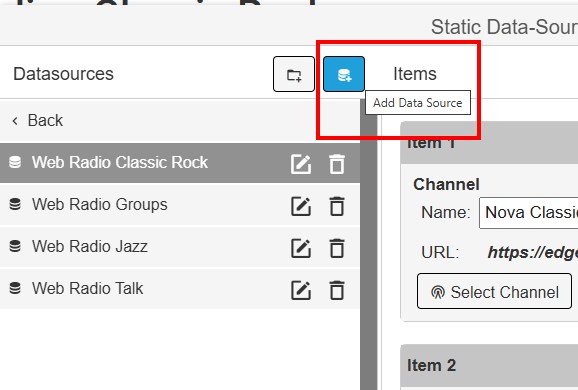
Start by creating a new data source as a copy of one of the existing ones, for example the "Classic Rock" data source:
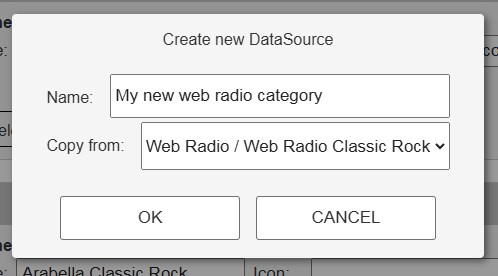
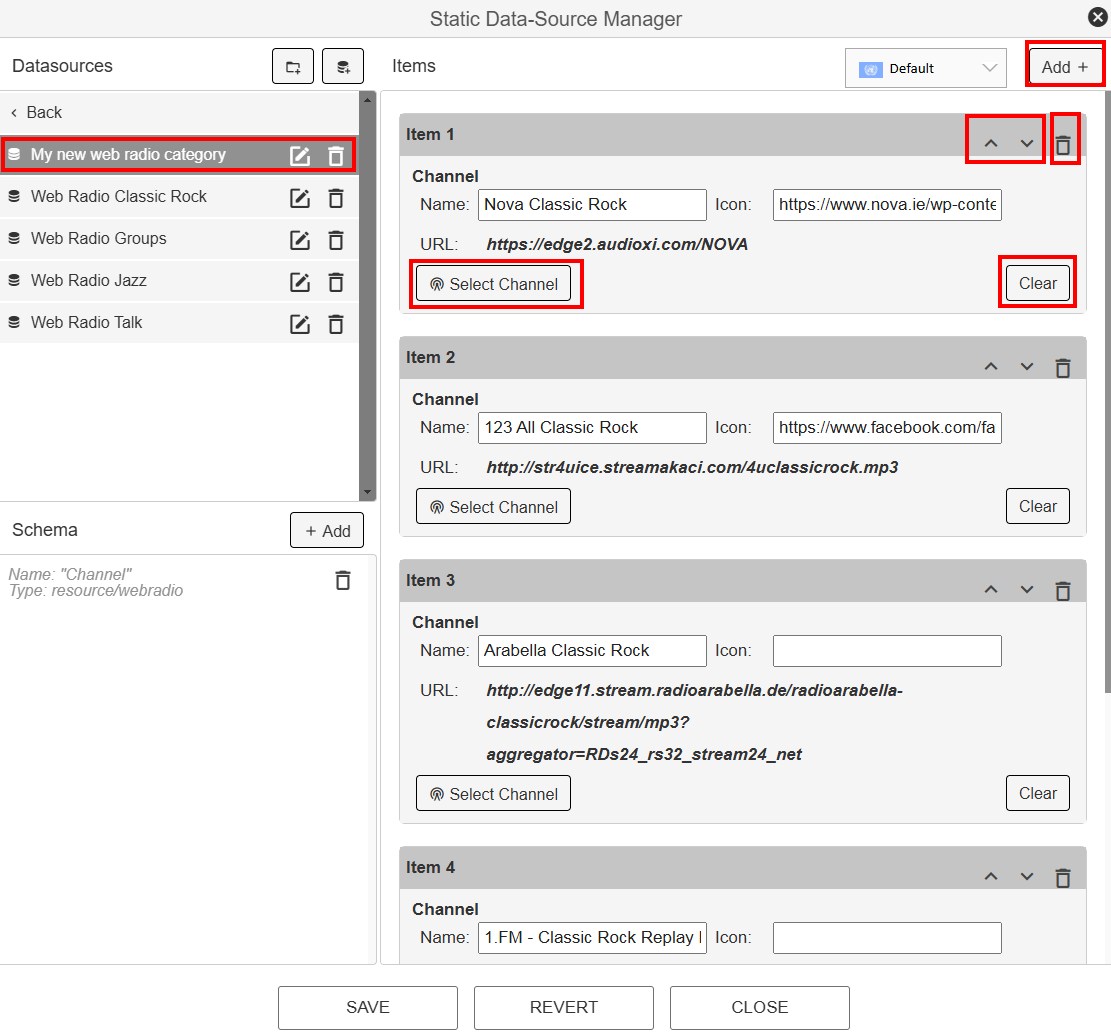
Now you can define the configuration of the new data source:
- Add new items with the "Add" button
- Delete items with the "Recycle bin" button
- Adjust the order of the items with the "Arrow" buttons
- Select the channel in the item with the "Select Channel" button
- Clear the channel in an item with the "Clear" button
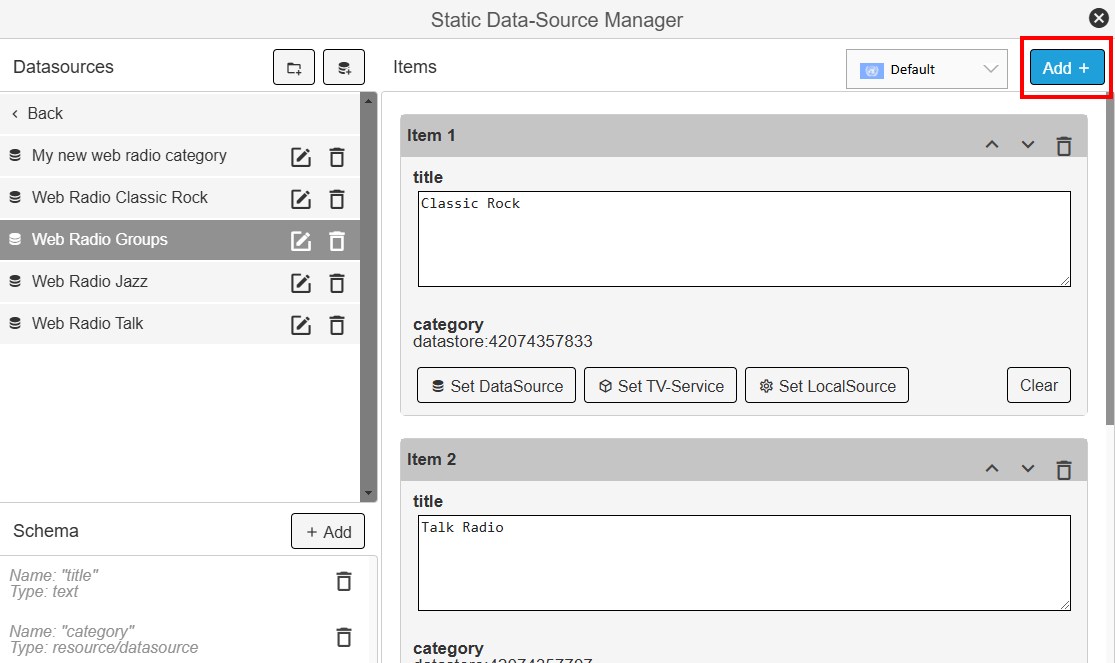
¶ Add a new web radio category to the list of categories
When you have created a new web radio category, you need to add it to the overall list of categories. This is done within the data source called "Web Radio Groups". Use the "Add" button shown below:
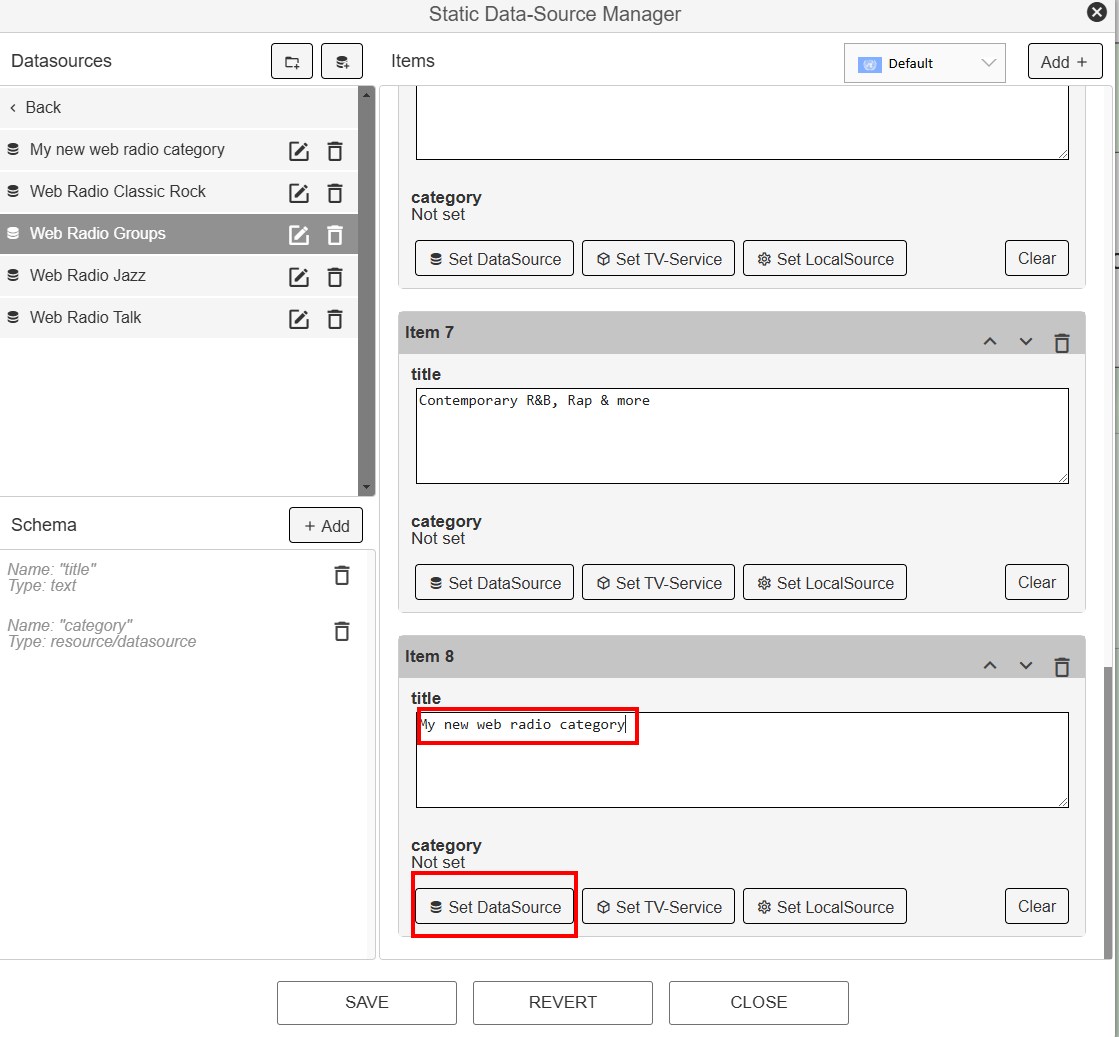
Now you add the title (to be visible on the TV) of the new category. In addition you map up the new data source within the "category" field:

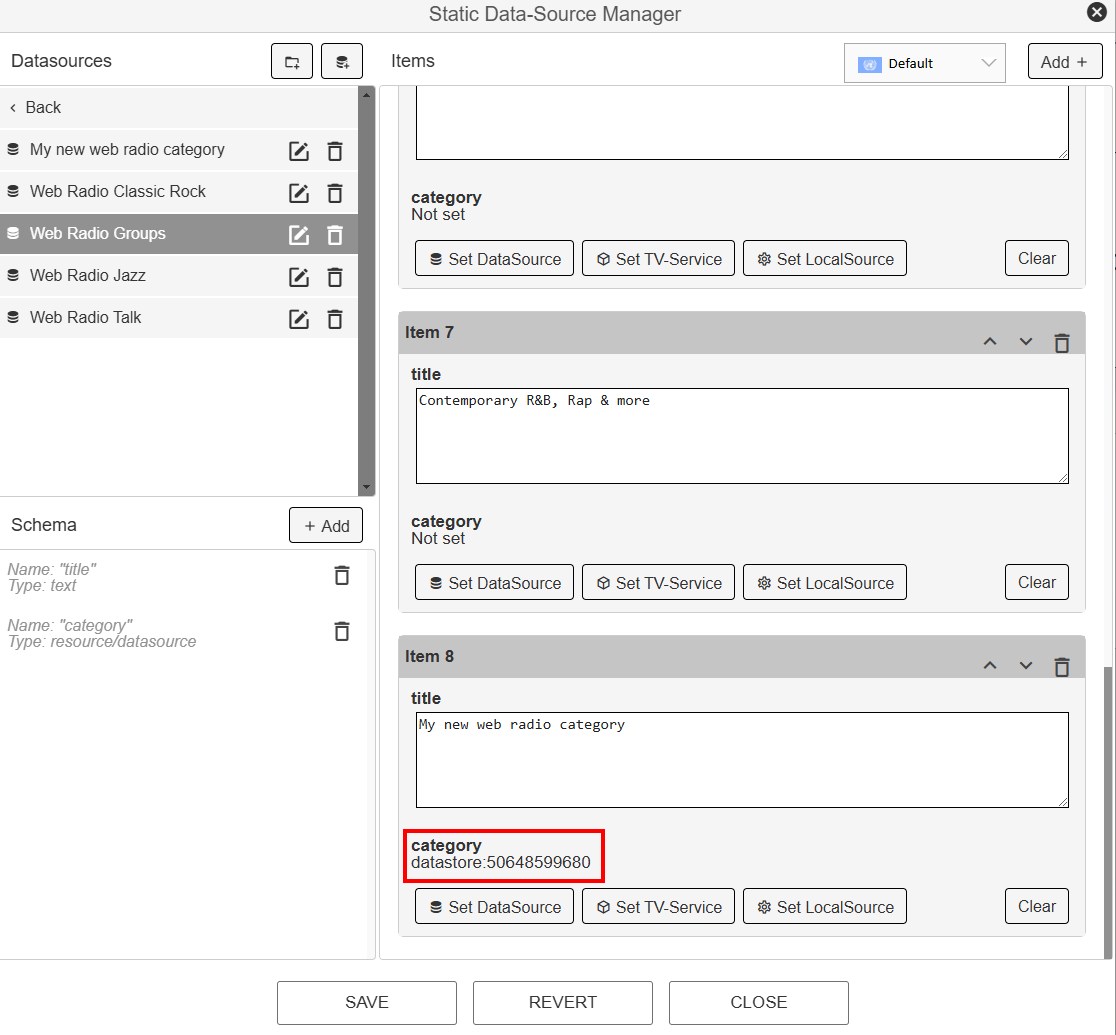
Now, after saving, you can see that the new category is visible in the TV menu: